by Megan | Mar 23, 2024 | blog, emergent literacy, tips, training
Don’t teach “letter of the week”!
I know that sounds like a bold statement but trust me when I say there is a better way that you can teach letters, the sounds they represent, and alphabetic knowledge, in general.
The new way to teach alphabet knowledge skills is through Letter of the Day!
I first learned about this concept while reading “Comprehensive Literacy for All ” (which, by the way, if you don’t have that book – grab it!) and it completely changed my way of thinking about this topic.
The idea is simple, you cycle through six cycles of the alphabet, teaching each letter one at a time, one day at a time. Through this cycle, you can introduce, teach, and highlight each letter of the alphabet more frequently throughout the year than when you focus on a letter for an entire week.
I have seen students flourish while using this method of teaching alphabet knowledge, developing deep knowledge and understanding of letters and the sounds they represent – plus, it keeps things interesting and fun!
Letter of the Day Cycles
Here are the six different cycles, rotated through every 26 days, and the suggested order of introduction:
Sequence #1: Letters are taught, one per day, beginning with the letters that appear most frequently in the names of students.

Sequence #2: Letters are taught in alphabetic order.
Sequence #3: Start with the letters that represent sounds that are in the letter names (i.e., b, p, f, m) and move to letters that represent sounds that are not in the name (i.e,, h, q, w, y) or represent more than one sound. (e.g., possible order could be: b, f, m, p, j, d, k, t, v, z, l, n, r, s, h, q, w, y, c, g, x, i, a, e, o, u)

Sequence #4: Teach letters based on the frequency of use in written English, beginning with words that appear least frequently. (e.g., possible order might be y, q, j, z, x, w, k, h, g, v, f, b, m, p, d, c, l, s, n, t, r, u, o, e, a, i)

Sequence #5: Teach letters in the order that typically developing children learn to say sounds in spoken English. Begin with sounds that children articulate earliest and move through the sounds for which articulation develops last. (e.g., possible order might be: n, m, p, h, t, k, y, f, b, d, g, w, s, l, r, v, z, j, c, i, a, e, o, u, x, q)

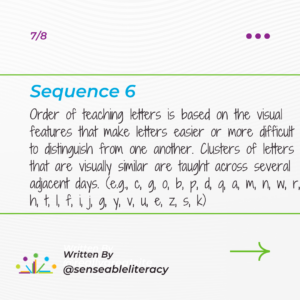
Sequence #6: Teach letters based on visual features that make letters easier or more difficult to distinguish from one another. Clusters of letters that are visually similar are taught across several adjacent days. (e.g., possible order: c, g, o, b, p, d, q, a, m, n, w, r, h, t, l, f, i, j, g, y, v, u, e, z, s, k)
Summary
While it seems like introducing a new letter each day, seems like it might be a lot more work. Initially, it might be, but the benefits of being able to target letters more frequently throughout the year and provide increased opportunities for learning about each letter, greatly outweigh the initial time investment. Also, once you start implementing these cycles, you can begin building a library and collection of activities that you can use with each letter.
Now that we know what the recommendations are for the sequences of introducing the letters each day, the next step is to learn how to introduce and run alphabet knowledge lesions right? Stay tuned for more information on that coming soon!
by Megan | Feb 3, 2024 | blog, books, emergent literacy, Sensory extension activities, tips
Sometimes, when you are stuck thinking of something you can do in therapy, to highlight literacy, or simply in play, you may think you have to come up with something new but read on to find out why you don’t and why repeating the same things can be beneficial for all learners.
Repeating things we’ve done before and maybe making them a little different is called “repetition with variety” and it’s a very important, research-backed technique that helps learners of all ages learn, understand, and retain new information, concepts, etc. A really simple way to think about it is: that repetition with variety is doing the same thing while also making it different. Sound confusing? Let me explain…
My favorite way to explain and use repetition with variety is with a book. It’s as simple as:
📚 read an engaging book
📚 engage in an extension activity related to the book
and then in the next session:
📚re-read the book
📚engage in a different extension activity related to the book
Here’s another example:
- Read “If You Give a Mouse a Cookie”
- After reading, learners can share their favorite type of cookie through a predictable chart with the stem: “My favorite cookie is _____.”
- Next session you re-read the book.
- After re-reading, learners can review the chart and then graph the different types of cookies to see which one is most liked.
- Additional extension activities could be:
- Sequencing the story
- Tasting cookies
- Making cookies
- Creating your own “if/then” scenarios to add to the book or write your own
- So many more!
As you can see, you can repeat the cycle – using repetition with variety – as many times as you want. Through repeating the reading of the book you are helping build literacy confidence in the learners and I promise they aren’t bored reading the same book. In fact, as readers become more familiar with the text through the repeated readings they may start to join in on reading the story with you!
Any questions about repetition with variety? Drop them in the comments on this post.
Until next time – happy reading!
~ Megan
by Megan | Jan 20, 2024 | AAC, blog, tips, training
I want to share my favorite AAC tip with you…
This tip is specifically for those who use an iPad as their communication device. If you have worked with anyone, specifically children, who use an iPad, you know that the “home” button can be very distracting, especially since pressing it will take you out of your communication app. If only there were a way to keep that from happening…enter “Guided Access”!
Guided access is a built-in setting within the accessibility features of all iPads. Once it is set up and enabled, the home button is essentially disabled, and if a user presses the home button, they will be prompted to enter a passcode to disable guided access. Before I continue rambling on about the greatness of guided access, let me show you how to set it up.
Open “settings” on the iPad.

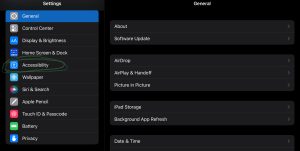
On the left, scroll down to “accessibility” and select it.
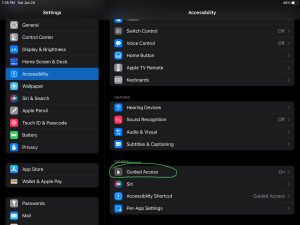
On the right, scroll down to “guided access” and select it.
Once “guided access” is selected you can select “passcode settings” to set a passcode that will need to be entered to disable “guided access”. (You will be asked to re-enter the passcode to confirm.)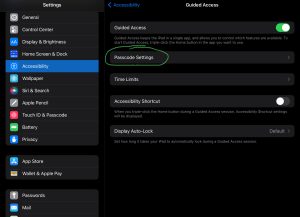
Once your passcode is set up, navigate to the communication app and open it.
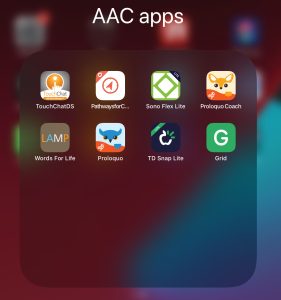
With the communication app open, click the home button three times (triple click) to activate “guided access”.
When guided access is enabled and the home button is pressed, a written prompt will appear at the top of the screen to triple-click the home button to disable it.
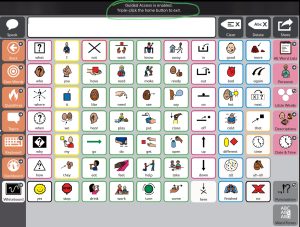
If you triple-click the home button, a pop-up will appear, prompting you to enter the passcode you set during setup.
If you enter the correct passcode, you will be prompted to choose “end” or “resume” guided access.
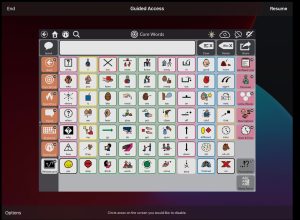
If an incorrect passcode is entered, you will have to wait a designated amount of time before an additional attempt.
Bonus tip!
If the iPad “dies” or runs out of charge, guided access is automatically disabled. Therefore, it never hurts to periodically check to see if guided access is enabled. To do so, just triple-click the home button. If guided access is enabled, the passcode pop-up will appear. If guided access is not enabled, triple-clicking the home button will reactivate it.

by Megan | Dec 16, 2023 | AAC, aided language input, aided language stimulation, blog, continuing education, core vocabulary, fringe vocabulary, modeling, prompt hierarchy
It’s the busiest time of the year! Wrapping up the year, buying gifts for all you love, finding time to celebrate with all your friends and family, you may feel like you are running around endlessly, the last thing you should have to worry about is making sure you have all of your continuing education units (CEUs) done to renew your licenses and certifications. 🤪
Before you close this window and start running around again, take the time to read to the end of this post, ‘cause I’ve got a way for you to rack up a bunch of CEUs for FREE! **Bonus if you want to learn more about AAC – these CEUs are AAC focused**
Ready to get started? Here we go!

- You will be redirected to a login page where you can create an account or, if you have an account within any Tobii Dynavox or Boardmaker programs, use that account login and password.

- After you log in you will be redirected to the Learning Hub, where you can start racking up those CEUs! Click on “Course Catalog” to see all the courses offered.

- Once you see the list of courses, you can also open the categories further to see additional specific courses.

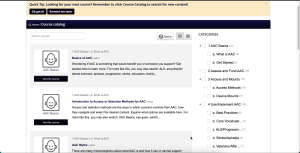
That’s it – you are ready to rack up a bunch of free CEUs to finish out your requirements for the end of the year, or whenever you need it!
If you work through any of these courses and find one that you really like, let us know in the comments so we can check it out too!
by Megan | Dec 10, 2023 | AAC, blog
Names are important!
However, just like words, the pronunciation of some names can not be determined by spelling alone. Various things like accents, pronunciation of sounds, and influence from the sounds around it can influence how we say a person’s name. Therefore, the only way to truly know how to say someone’s name is to ask them. 
I can hear you now, “But, what if they can’t talk yet or they use a different way to communicate?” and you’re right. If the learner is too young to say their name, you can ask a family member or someone close to them to know how to say their name. But what if there is no one there to tell you how to say their name and/or they are non-speaking? That makes things a little more challenging; however, using a high-tech AAC system should allow the user to share their name with communication partners – we just have to make sure that the system knows how to say their name.
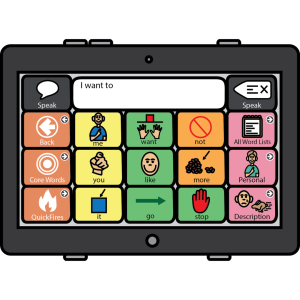
That sounds simple enough. At first thought, you might think, “I’ll just type the user’s name into a button and we are all set.” – sometimes it is that easy – but sometimes it’s not. We all know that not all names are pronounced the same as they are written, so it’s crucial that, after you type in the user’s name into the button, you double-check that the device is saying the name correctly. If the name sounds correct you are good to go! But, what do you do if the device mispronounces the name?
Most, if not all, communication devices have an area where you can input “pronunciation exceptions” for any words included within the device that need to be pronounced differently than they would be pronounced based on their spelling. To activate these pronunciation exceptions and have them saved within the device, you must first type in the word as it appears on the communication device and then pair that with the phonetic spelling of the word, or how it sounds.
This video is an example of how you can do this within the TD Snap application: https://www.instagram.com/reel/C0fdlJ9xOEM/?igshid=NzBmMjdhZWRiYQ==
While this may seem like a simple task, sometimes the simplest tasks are the most important! Being able to say your name and hear someone else say your name correctly is vital for social connection and respect. So, next time you program an AAC user’s device or help an AAC user program their device, don’t forget to check how the device is pronouncing their name and adjust as needed.
by Megan | Jul 15, 2023 | AAC, blog, modeling
Time for an update!
In a previous blog post, I shared how I was working my way through the fantastic chart shared by Angela Moorad, MS CCC-SLP, from Omazing Kids AAC, LLC – Free AAC apps chart. Now, I’m back to update you on my progress, apps that I’ve added to my iPad through the steps in this chart, and the next steps, now that I have access to these apps.
Here are the apps that I have added to my iPad so far:

- TD Snap
- Proloquo
- Grid 3
- Touch Chat
- LAMP Words For Life
- Speak For Yourself
- Proloquo2Go
First and foremost, I want to acknowledge how easy this process has been and I 100% attribute that to the chart referenced above. Download this chart, follow the steps listed for each app and you too can add a variety of AAC apps to your iPad.
Before we move on, I want to be sure that I remind you that, just because you CAN get access to all of these apps, doesn’t mean that you SHOULD, or HAVE to! Let me explain…

While the companies are generous and provide free codes for downloads for their apps, these free download codes are not unlimited. Therefore, if you primarily use one app, want to learn more about a specific app, etc then that would be the app to start with, look at first and then wait on the others. However, if you are an SLP or other professional that provides AAC evaluations, it might make sense for you to have a variety of AAC apps available to you in order to trial them with learners, clients, etc. to determine which app works best for each individual. With that being said, I have downloaded these apps because I am actively providing AAC evaluations for a variety of learners and/or clients.
After being provided access to these AAC apps, my next steps, and what I would encourage you to do as well, is to continue your professional learning about each of these apps. Because, while all the apps provide a way to assist communication for those that need it, each app has its own, individual language system, organization, features, etc. Increasing your knowledge of the different features within systems will assist you when you are completing an AAC evaluation and determining which feature(s) will be best for each individual user.
With the ever-increasing variety of AAC apps available, this task can seem overwhelming, but remember, as I shared in a previous post – it’s ok to take your time. Start with one app, learn the features of that app, practice using that app, etc and then, when you feel confident, move on to a new app, then rinse and repeat.
Have you downloaded the chart yet? Are you working through learning more about AAC apps? Comment below and let us know how it’s going!


Recent Comments