by Megan | Dec 16, 2023 | AAC, aided language input, aided language stimulation, blog, continuing education, core vocabulary, fringe vocabulary, modeling, prompt hierarchy
It’s the busiest time of the year! Wrapping up the year, buying gifts for all you love, finding time to celebrate with all your friends and family, you may feel like you are running around endlessly, the last thing you should have to worry about is making sure you have all of your continuing education units (CEUs) done to renew your licenses and certifications. 🤪
Before you close this window and start running around again, take the time to read to the end of this post, ‘cause I’ve got a way for you to rack up a bunch of CEUs for FREE! **Bonus if you want to learn more about AAC – these CEUs are AAC focused**
Ready to get started? Here we go!
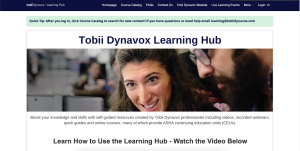
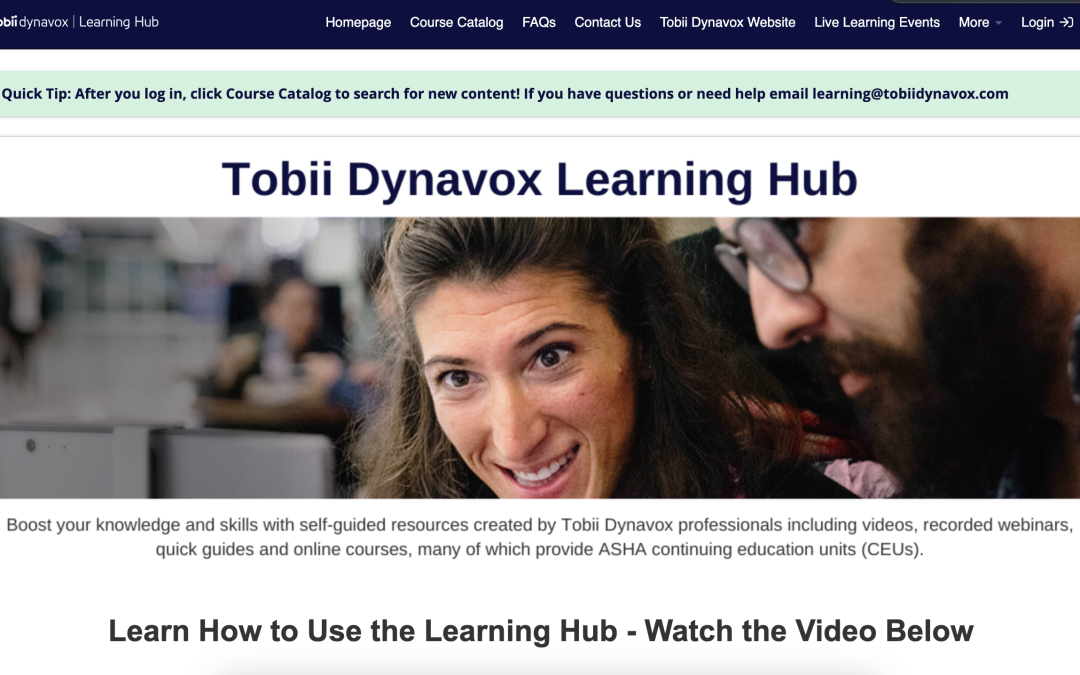
- You will be redirected to a login page where you can create an account or, if you have an account within any Tobii Dynavox or Boardmaker programs, use that account login and password.
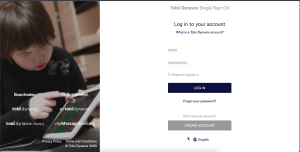
- After you log in you will be redirected to the Learning Hub, where you can start racking up those CEUs! Click on “Course Catalog” to see all the courses offered.
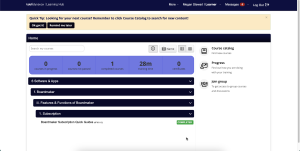
- Once you see the list of courses, you can also open the categories further to see additional specific courses.
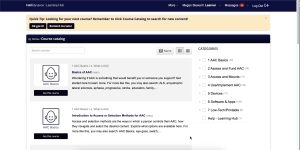
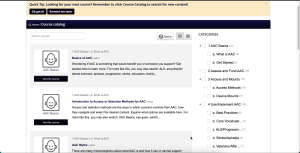
That’s it – you are ready to rack up a bunch of free CEUs to finish out your requirements for the end of the year, or whenever you need it!
If you work through any of these courses and find one that you really like, let us know in the comments so we can check it out too!
by Megan | Feb 10, 2021 | AAC, aided language stimulation, core vocabulary, modeling, Sensory, Sensory extension activities, Storybook Sessions
Storybook Sessions: Garrett Morgan
In each Storybook Sessions post, I highlight a book that I have used, or plan to use in therapy as well as associated, extension activities that can be paired with the book to increase vocabulary comprehension, provide opportunities to express yourself verbally, written, creatively, etc., sensory exploration, fine motor practice, gross motor movements, etc. Some extension activities will focus on all of these components while others will focus more specifically on one area.
Garrett Morgan
Author: Megan Stewart
Illustrator: Symbols by Boardmaker 7
Do you ever have an idea for an activity to do, book to read, etc but can’t find exactly what you are looking for? Anyone else, or is it just me?
This happened to me while I was planning for my February sessions. I knew I wanted to highlight a famous black person from history to celebrate Black History Month with my students but while looking for a book to lead my activity/session, I wasn’t able to find what I was looking for. I will say that there are a TON of great kids books featuring and highlighting famous black people, however I waited too long to put these on hold or check out from my library, so I decided to create my own.
My Book Creation Process
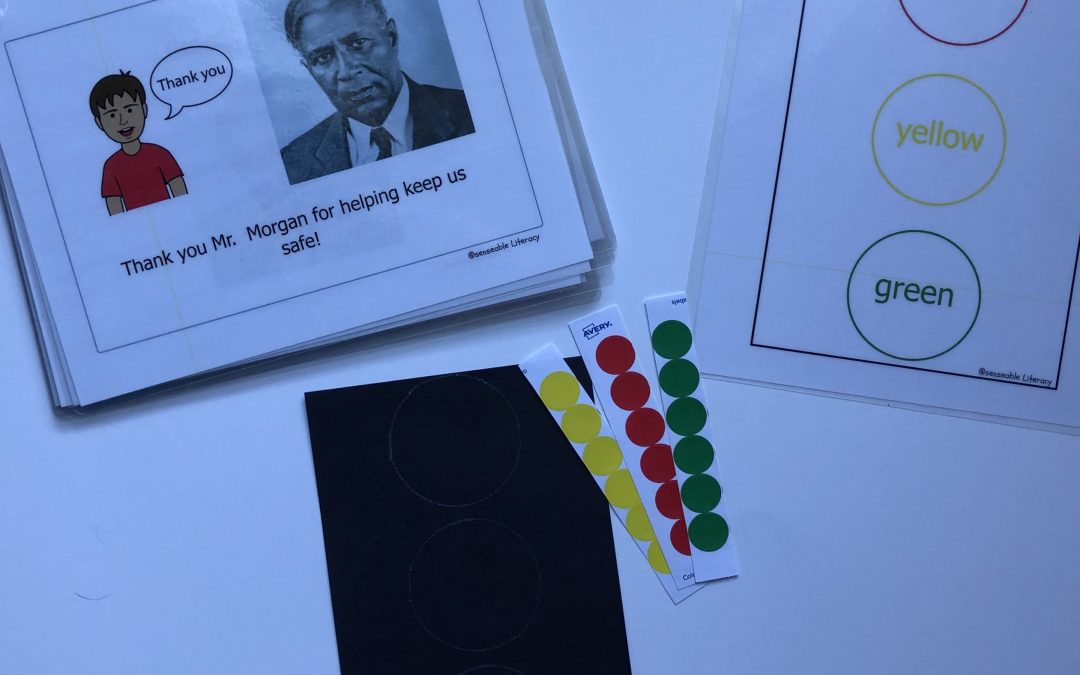
I chose to highlight Garrett Morgan, who added the yellow light to the stoplight as we now know it, within my lesson. With a quick Google search to find a picture of him, and learn a little more about him and his inventions, I took that information, opened Boardmaker 7 software and got to work! Using the printable book template, I was able to easily add in pictures, symbols and text that told the story of who Garrett Morgan was, why we need to learn about him, what his invention was (Mr. Morgan did invent items other than the stoplight, (i.e., the gas mask), but I thought this invention was most appropriate to highlight for my PreK students), and how it has affected our world. Here’s a sneak peek of the book:
Now What?
Now that I had the book, I needed to decide on the extension activities to continue our learning after we read the book. I chose activities that focused on color, shape and number recognition & labeling, spatial concepts, fine motor skills, bi-lateral (both sides) hand coordination, sorting, following directions, and gross motor skills.
Creating A Personalized Stoplight
In the first activity, the students create their own stoplight.
First, I cut black construction paper into rectangles and drew 3 circles down the center with a white crayon.
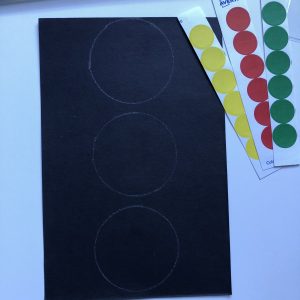
Stoplight template and stickers
Second, I cut color coding stickers from Avery into strips of yellow, green and red.
Each student was given a stoplight template and, after a model from an adult, placed all of the colored stickers onto their stoplight template. Hopefully the students placed the stickers in the right place based on color, but if not, that’s ok too – I am all about fostering independence and creativity and this is not a test!
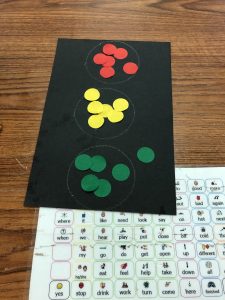
Student Created Stoplght
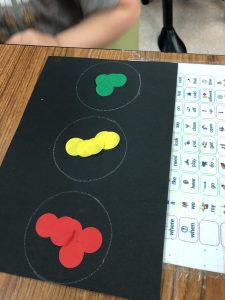
Student Created Stoplight
Additional Skills Addressed While Creating the Stoplights
While the students were making their stoplights, we were able to focus in on the topics of:
- Colors
- Shapes
- Location words (prepositions)
- Quantity (numbers, more, less)
Don’t forget all the Core Vocabulary!
And of course we used our core vocabulary communication boards to chat, modeling words, individually and in short phrases, such as:
- Put
- On
- More
- Where
- Help
- Want
- Like
- Not
- Different
- I
- My
- You
- Finished
- Here
- That
- Again
- Next
- See
- All
The Fun Doesn’t Stop There!
After students finish their stoplight you can:
- Help them write their name on their paper and send home to share with families.
- Laminate their stoplight to use in additional extension activities such as sorting by color.
- Use this sorting template to find items that are red, yellow and/or green in their environment.
- Watch some fun “stoplight videos” such as:
- Play “Red Light, Yellow Light, Green Light” to help get the wiggles out. You can use these visuals to further show students if they are to “GO”, “SLOW” or “STOP”.
- Play with cars and other vehicles, using your traffic light to tell the cars to “GO”, “SLOW down” or “STOP”
This Sounds Great! Where Can I Find These Resources?
If you are interested in doing these activities and/or reading the book about Garrett Morgan to your students I have linked them here for you to download:
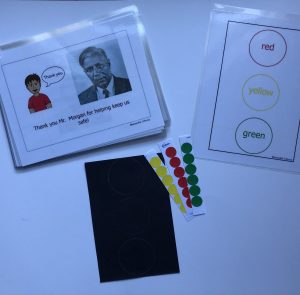
Garrett Morgan book and activities
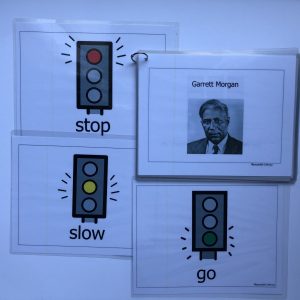
Garrett Morgan Printable and activities
If you create stoplights in celebration of Garrett Morgan and his invention, I’d love to see it!
Post pictures in the comments below or tag me (@senseableliteracy) in posts online!
Until next time – Happy Reading!
by Megan | Dec 29, 2020 | AAC, aided language input, aided language stimulation, core vocabulary, modeling, YouTube
Are you looking for fun ways to incorporate core vocabulary, early first words and literacy into therapy sessions and/or daily routines but not sure what books to read and/or how to focus on specific words while reading?
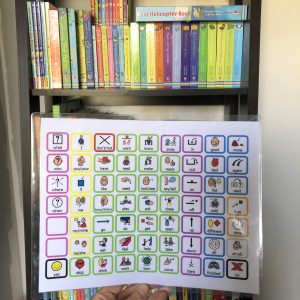
Core vocabulary and literacy – a perfect match!
You’re in luck! I am going to introduce you to one of my favorite books to read, focusing on the core vocabulary word “GO”. I am also going to show you examples of how I might read this book with students to provide lots of opportunities for communication partners to model the word “GO” as well as opportunities for students to imitate and/or initiate communication with that word.
Ready? Here we GO!
Let me introduce you to “Busy Trucks on the Go” – a picture book filled with engaging scenes featuring various trucks and vehicles that kids may see throughout their day. The illustrations are narrated with simple rhyming text that labels the name of the vehicle as well as providing a clue as to the job the vehicle helps perform within the community. This mix of engaging, colorful illustrations and rhyming, rhythmic text make this book a fun read for kids and adults alike!
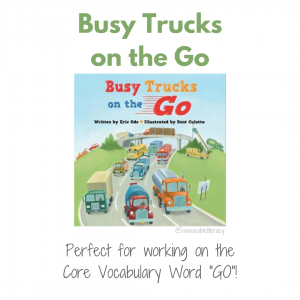
Something to note is that the word “GO” is not included frequently within the text and therefore, the reader should not rely on the text alone to provide opportunities for modeling “GO” for students. However, opportunities to model “GO” do appear frequently when looking at and chatting about the illustrations of the trucks and vehicles as well as the adventures of a boy and his dad as they move about town seeing the various vehicles.
Modeling Core Vocabulary while reading…
This book lends itself very easily to engaging in shared reading between an adult and student – sharing observations about the illustrations such as:
Where are the vehicles are “GO”ing?
The cement is “GO”ing out of the cement truck.
Dirt is “GO”ing in the dump truck.
Dad’s truck can not “GO”.
Water is “GO”ing out of the fire hose.
Where are the people are “GO”ing?
Remember…
Follow the lead of your students or whomever you are reading with during shared reading, modeling various vocabulary as you read. While you may be focusing on one core vocabulary word in particular, modeling a variety of words demonstrates that there are no “right” or “wrong” words and that you can say lots of different things about the same picture.
I need this book!
Ready to add this book to your library? Follow the link below to purchase this beautifully illustrated and engaging book:
Busy Trucks on the Go: https://c8314.paperpie.com/p/3737/busy-trucks-on-the-go
Remember – there is no right or wrong way to read a book – just keep reading!

By the way…
P.S. If you are a visual learner or just hang out on YouTube – you can watch this content come to life there: https://youtu.be/2rA-gROzCF0
by Megan | Dec 21, 2020 | AAC, aided language input, aided language stimulation, core vocabulary, modeling, Sensory, YouTube
Are you looking for fun ways to incorporate core vocabulary, early first words and literacy into therapy sessions and/or daily routines but not sure what books to read and/or how to focus on specific words while reading?

Core vocabulary and literacy – a perfect match!
You’re in luck! I am going to introduce you to one of my favorite books to read, focusing on the core vocabulary word “GO”. I am also going to show you examples of how I might read this book with students to provide lots of opportunities for communication partners to model the word “GO” as well as opportunities for students to imitate and/or initiate communication with that word.
Ready? Let’s GO!
Let me introduce you to the “Busy Train Book” – it’s one book in a collection of Busy Books that include: Busy Car, Busy Helicopter, Busy Bug and one that is released around the holidays, Busy Santa. Each of these books includes a pull back and go vehicle that travels around four various tracks throughout the story book, with each page narrating the travels of the pull back and go vehicle.

The “Busy Train Book”: Perfect for modeling the core vocabulary word “GO”.

Additional Busy Book Titles including Busy Helicopter, Busy Car, Busy Bug, & Busy Santa

Each book has 4 tracks for traveling throughout the book!
The train in this book, and the vehicles in all the other Busy Books, are highly motivating and provide a built in opportunity to practice modeling and using the word “GO” multiple times on each page which is fantastic for early communicators – you can model “GO” while checking out the scenes around each track without reading the text.
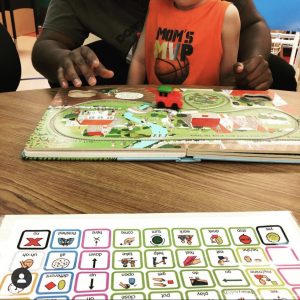
PreK student reading and playing with the “Busy Train” book
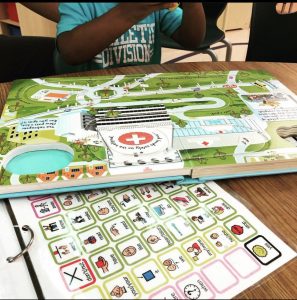
PreK student playing with and reading “Busy Helicopter” book.
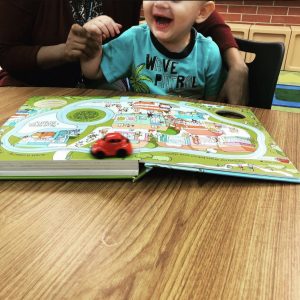
PreK student playing and reading the “Busy Car” Book
Incorporating Core Vocabulary while reading…
Opportunities to model “GO” are everywhere in the book and starts on the first page where the text encourages the readers to place the train on “start” and let it “GO”!
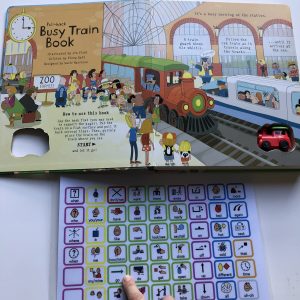
Modeling opportunities start on the first page!
Other opportunities to model “GO” include:
When starting the train on the track, say and model: “READY, SET, GO!”
While the train is moving along the track, say and model: “LOOK AT THE TRAIN GO!”
If the train stops you can say and model “GO” by saying “Let’s make the train GO again!”
The word “GO” is also in the text on 2 of the tracks – this is a natural opportunity to model “GO” while reading the text to build literacy skills.
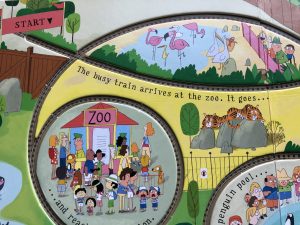
The word “GO” is featured in the text as well – providing extra opportunities for modeling and literacy.
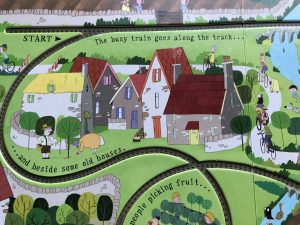
Text featuring the core vocabulary word “GO” provides extra opportunities for modeling and literacy exposure.
But that’s not all!

There are lots of additional Core Vocabulary to model while reading as well!
While this book lends itself to easy and frequent modeling of the core vocabulary word “GO”, there are lots of other core vocabulary words that can be modeled throughout this book, including:

There are many opportunities to model “LIKE” throughout the book!

There are many opportunities to model the core word “LOOK” while reading.

Don’t forget to ask questions while reading and modeling!

“TURN” is easy to incorporate often while reading.
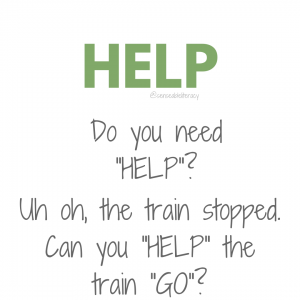
A great opportunity to practice asking for help!
There are lots of prepositional concepts throughout the book to chat about as well!
Remember…
Follow the lead of your students or whomever you are reading with, modeling various vocabulary as you go. The illustrations within the book are beautiful visual scenes filled with lots of different objects, actions and places to explore and chat about!
I can’t wait to incorporate literacy, AAC & play!
Ready to add this book or others from the Busy Book collection to your library? Check them out here:
Remember – there is no right or wrong way to read a book – just keep reading!

Just keep reading!
One final note…
P.S. If you are a visual learner or just hang out on YouTube – you can watch this content come to life there: https://youtu.be/ScWO9dTYmfE
by Megan | Nov 29, 2020 | AAC, core vocabulary, fringe vocabulary, Sensory, Storybook Sessions
Storybook Sessions: “That’s Not My Snowman”
In each Storybook Sessions post, I highlight a book that I have used, or plan to use in therapy as well as associated, extension activities that can be paired with the book to increase vocabulary comprehension, provide opportunities to express yourself verbally, written, creatively, etc., sensory exploration, fine motor practice, gross motor movements, etc. Some extension activities will focus on all of these components while others will focus more specifically on one area. Books and all materials are linked as well to provide easy online shopping so you can easily gather materials to replicate these activities and enjoy them yourself. (Simply click on the title of the book and/or material listed and you will be redirected to an opportunity to purchase and/or learn more)
Author: Fiona Watt
Illustrator: Rachel Wells

“That’s Not My Snowman”
This book, like the others in the wildly popular, “That’s Not My…” series, features various textures and sensory elements via touchy-feely patches on each page. The story line also features a simple, repetitive text: “That’s not my snowman, it’s ____ is too ____.” This repetitive line promotes basic, emergent literacy and language skills for readers, providing multiple opportunities to see and hear familiar words which will in turn, increase their comprehension and recognition of these repeated words. The various items that are featured and described in the repeated line are those that contain the different touchy-feely patches on each page (e.g., “…it’s hat is too soft.”). Featuring and describing these items provides the reader with opportunities to increase their receptive vocabulary through identifying the labeled items (nouns) as well as describing how they feel (adjectives).
As readers become more familiar with the text and associate the feel of the various sensory elements with the descriptive vocabulary provided, they will have the opportunity to use this vocabulary in their own expressive communication as they read the book and/or describe various items they interact with throughout their day. An added bonus for students who are emergent language and literacy learners, who may also be using Augmentative and Alternative Communication (AAC) is that this book is full of core vocabulary that can be modeled on a communication device/system. Examples of core vocabulary within the book include: “that”, “not”, “my”, and “it” as well as the multiple opportunities to model “turn” for turning the page, “help”, “feel” for exploring the touchy-feely patches, “you” and “I” and so many more!
As you can see, there are so many reasons that this book is a no-brainer to use within my language therapy sessions but it’s a great book to read with any emergent reader and language learner to help build and refine their literacy and language skills. Reading books like this become even more fun when you pair reading with a fun, sensory based extension activity like these fun sensory snowmen.
Simple, cheap and fun = win, win, win!
Sensory Snowmen
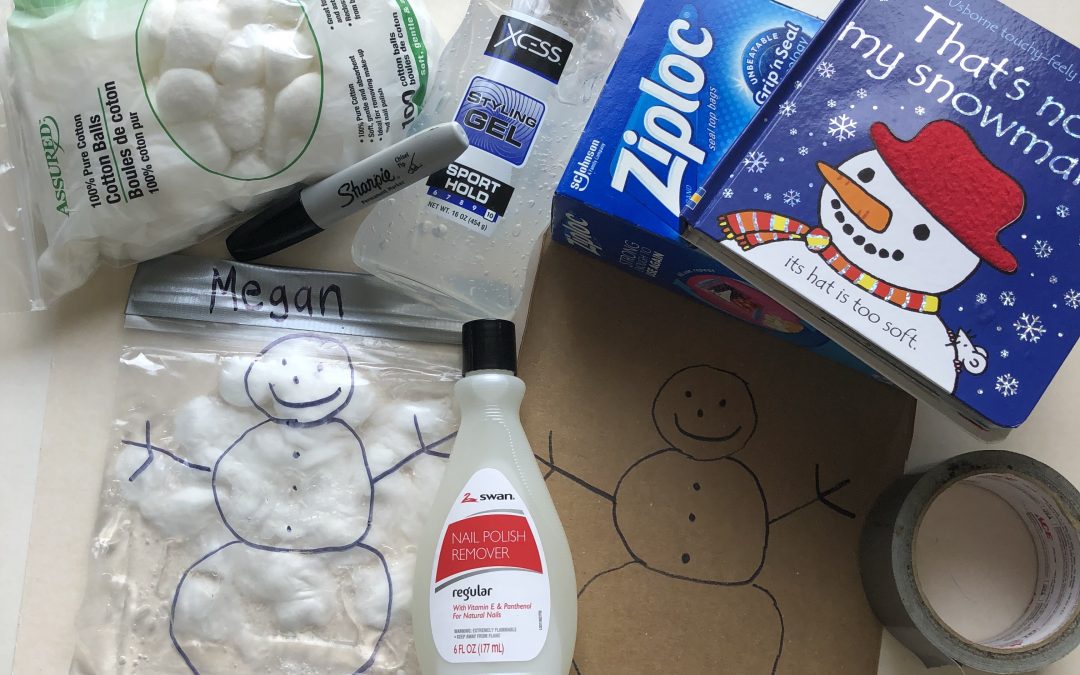
All you need for this simple, fun, sensory extension activity is:
Materials needed for sensory snowmen extension activity.
Step 1:
- Remove the label on the resealable zipper storage bag(s) with nail polish remover. (This really works – promise! I was a skeptic too but was shocked at how easy it was to remove!)
- Dry nail polish remover residue from bag.

Nail polish remover removes labels from resealable storage bags
Step 2:
- Draw a template of a snowman on a piece of cardboard using a permanent marker.
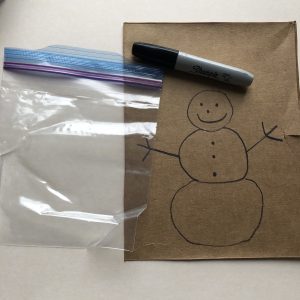
Draw a snowman template on piece of cardboard
Step 3:
- Place resealable zipper storage bag on top of snowman template & trace onto bag with permanent marker.
- You can also encourage kids to draw their own snowman on the bag – be creative!
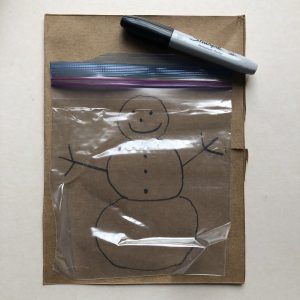
Place resealable storage bag over snowman template.
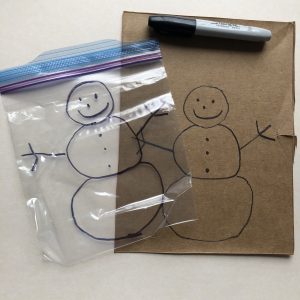
Trace snowman template onto resealable storage bag or let kids draw their own snowman.
Step 4:
- Place a few cotton balls inside of the bag (number of cotton balls will depend upon how full you want your bag to be as well as how big your bag is).
Step 5:
- Squeeze hair gel into the bag until cotton balls are able to be pushed around when in contact with the gel (again, the amount of gel needed will depend upon the size of the bag as well as how many cotton balls were used – not an exact measurement).

Put cotton balls and hair gel into resealable storage bag.
Step 6:
- Seal bag and reinforce with duct tape (may need to reinforce on both sides of seal to ensure closure).

Reinforce seal of resealable storage bag with duct tape and label with name.
Step 7:
- Use a permanent marker to label the bag with the name (of snowman or kiddo).
- Encourage kids to write their own name to practice emergent writing skills.
Step 8:
- Enjoy moving the cotton ball “snowballs” around within the bag to personalize the look of your snowman over and over again!
- Re – read “That’s Not My Snowman” again – while students play with the sensory snowman bags that they just created!
There are a lot of ways that you could personalize this activity even further, such as adding additional sensory elements to the bag such as sequins, small snowflake confetti, glitter, etc. – Have fun and be creative!
If you create Sensory Snowmen bags with your students, I’d love to see them! Share pictures in the comments here or tag me (@senseableliteracy) in your posts online!
Until next time – Happy Reading!
by Megan | Apr 8, 2020 | AAC, core vocabulary, modeling, training, YouTube
Modeling Language with AAC
In this post, we are going to talk about a very important strategy that all communication partners for emergent AAC users should use, that goes by many names. Some of these names are modeling, aided language input, and aided language stimulation. They all mean the same thing, it’s really more of a preference as to which word you use. Throughout this post, I am going to use the term “modeling”.
Now, if you are thinking, what is that AAC thing that she was talking about? Pause here and go back to read this post – “Introduction to AAC, Core & Fringe Vocabulary”. After you read that post you will have a better understanding of the basics of AAC and therefore be able to gain more information from reading this post.
What is Modeling?
Ok – the first question you probably have is “What is modeling?” No, it’s not walking around on a catwalk and it has nothing to do with fashion. As opposed to that kind of modeling, this is the type of modeling that anyone can do! Yes, now is your turn to be a Supermodel!
I never thought I’d be a model but here I am modeling AAC and killing it!
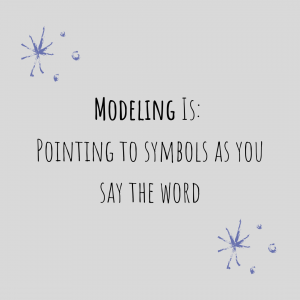
Simply put, modeling with an AAC system is pointing to symbols in a communication system as you verbally say a word. Pay attention to those words, we are only talking about what we as the communication partners are doing and not about what the student is doing. The focus of modeling is on what we are providing to the students. There are no expectations for the student – except for their presence. That’s it! As long as the student is present, we can model language for them.
Modeling Is: Pointing to Symbols As You Say The Word
The focus of modeling is on what WE are providing to the students. There are NO expectations for the student – except for their presence.
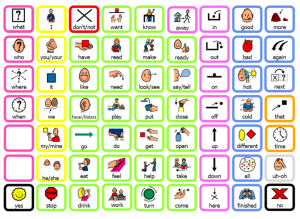
If you’ve ever seen a core vocabulary communication board or any AAC system, you have seen these fun, often colorful, pictures, called symbols, with words underneath them, arranged in a grid – like this.
Example of a Core Vocabulary Communication Board
This is an example of a core vocabulary communication board. For our AAC users, learning how to use these symbols to communicate is similar to us learning a new language.
Why do we need to model language?
I don’t know about you but if I am learning a new language, the addition of pictures or some way to visually show the word I’m learning, will help me learn and remember the word for future use. The addition of pictures also activates another mode of learning through making language visual which often helps students learn and remember what various words mean. Learning to use symbolated language is similar to learning a new spoken language.
In order to teach our students how to use this new language system of symbols we have to teach them how to use the system by using the system that they are using. Now, these core vocabulary based AAC systems may not look confusing and may be clear for us as communication partners, however we are able to read the labels underneath the words to ensure that we know what the pictures are representing.
We have to teach them HOW to use the system by USING the system that they are using.
If we took the words or labels away and just left the pictures, do you think you’d be able to know what the pictures represented? Some probably yes, as they are easily represented in pictures such as the “stop” sign as well as “eat” and “drink”. However, others are much more difficult to “symbolate” or turn into pictures, such as “more”, “all”, “do”, “turn”, etc. So, if we don’t teach our students what these pictures and symbols represent, how can we expect them to understand what the symbols mean, much less use them to communicate with us? This is why we need to use, and talk to students with, their AAC system!
How do I model language?
So, now that we know what modeling is and why we need to do it, let’s talk about how to model language on AAC systems for our students. The first thing I want you to know is that you should continue to speak to the students as you normally would. You can and should continue speaking to students in phrases and sentences as you have been, there is not a need to only verbally say the words and symbols that you are pointing to and modeling.
With that said, it is most beneficial to model one word above what the student is currently able to use independently. What that means is that if a student is not yet using or initiating any communication via symbols and/or AAC, you should only model one word/symbol for them. If a student is independently using one word/symbol to communicate via AAC, you can then model two words for them to help expand their symbol use for communication.
Feeling Overwhelmed?
If you are feeling overwhelmed with all this information, let me assure you and remind you that you can do this! Do not worry about doing it “wrong” – there is no right or wrong words to model on any AAC system. Modeling any words is better than modeling no words.
In fact, you can model different words every time you engage in an activity! For example, during book reading, during one reading you can model the words “turn”, “look”, “like”, “I”, etc and on another reading of the same book, you could model the words, “my”, “you”, “more”, “again”, “yes”, etc. Both readings are equally important. That’s one of the wonderful things of core vocabulary based AAC systems – you can model a variety of words and all are appropriate!
Modeling ANY words is better than modeling NO words.
Another worry of some that are not yet familiar and/or comfortable with modeling words/symbols is that they don’t know where all the symbols are within the AAC system. That’s totally ok – and normal!
I am familiar with many different AAC systems and I still have difficulty finding symbols sometimes. There is not need to wait until you know where all the words/symbols are before you start modeling. If you do that, you will never start modeling language for your students!
When you find yourself in the situation where you can’t find the word/symbol that you are looking for, talk through the process you are using to find the word aloud – so the student can hear you. I often say things like: “I can’t find ‘play’. Where did that word go? Hmmm…” while I’m saying this, I am scanning the board, tracking with my index finger as if I am pointing. Then, when I find the word/symbol I am looking for, I say, “Oh! I found it, there’s ‘play’” and then I restate what I was going to say – for example “Do you want to play?”
Talking through your strategy to find the word that you are looking for helps the kiddo/student to know that they are not alone if they do not know where all the words/symbols on their AAC system are. It also teaches and shows them that they don’t have to be perfect and that it’s ok to make mistakes, everyone does.
If you are still overwhelmed, try this – pick one word/symbol from the core vocabulary AAC system that your student uses and model that one word/symbol as often as you can throughout the day. When you feel comfortable with that word/symbol you can then change to a different word/symbol to model. I know that as you continue to practice modeling, you will become more comfortable with it and will be modeling a variety of different words/symbols before you know it!
Hopefully, by this point, you are feeling more comfortable with what modeling is, why we should use it and how to use it. To wrap things up, I want to touch on some questions that are frequently asked when I teach on this topic.
Frequently Asked Questions:
Who Should Be Modeling Language On Students’ AAC Systems?
Everyone! All people that the student could possibly communicate with throughout their day should model language! Adults and children, teachers and peers, siblings, parents, aunts, uncles, grandparents, cousins, etc. Anyone that would or does normally talk to the student, should continue to do so, with the addition of modeling the words they are saying on the student’s AAC system. This helps student’s learn that communication happens everywhere with everyone and is not an activity that only happens with certain people.
Where Should We Model Language?
Everywhere! Just as we are encouraging the student to communicate with everyone – we should also be encouraging them to communicate everywhere they go! We are able to communicate wherever we go and so should our AAC users! You can help make this easier through ensuring that the student has access to their AAC device/system wherever they go. This could be through the student taking their device/system with them, or having multiple copies of their communication system in various locations throughout their day for easier access.
What If They Aren’t Looking At The AAC System When I’m Modeling?
It’s ok! Even if they don’t seem like they are looking or listening – keep going, you will be amazed at what they are picking up, hearing, etc! Some students may be looking out of their peripheral vision or in a way that’s not obvious. They may look when you look away, which means that you would most likely miss seeing them look. This could be for various reasons, for example, some students may have difficulty looking at, listening to and processing information all at once – it’s too much of a strain on their sensory systems. They may need to look, listen and attend at different times to help increase their attention and comprehension. The biggest thing to remember is that we don’t have to wait for the student to look at the symbol/word before we model that word/symbol. If we do that we will miss many opportunities to model language for our students. “If we wait for the look, we will never get to the language!”
What If They Won’t Let You Model On Their Device, Core Board, etc?
Honor that – it’s their language system. If we want to instill a sense of ownership in the student with their AAC system, (and we do) we need to teach and show the student that their AAC system is theirs and that they are able to make choices about who uses their system and who doesn’t.
To combat this and ensure that we are still able to model language for our students throughout their day, it is important to have an additional version of the student’s language system – you will most likely have to make a paper version of a digital device – to model language on.
Another option is to see if they will let you “point” to model without touching their device/core board – hovering your finger over the symbols or use a laser pointer or finger light to model without touching their system.
Now that we have reached the end of this post, I hope that you feel much more comfortable with modeling – what it is, why we use it, and how to do it. If you have any questions about modeling, please feel free to reach out via email or through posting your question in the comments below.
If you’d like to see some examples of modeling within AAC systems, check out the videos posted on the SENSEable Literacy YouTube channel!
The content of this post in video format can also be found here: https://youtu.be/cbiiWv9fxjo




Recent Comments