by Megan | Dec 29, 2020 | AAC, aided language input, aided language stimulation, core vocabulary, modeling, YouTube
Are you looking for fun ways to incorporate core vocabulary, early first words and literacy into therapy sessions and/or daily routines but not sure what books to read and/or how to focus on specific words while reading?
Core vocabulary and literacy – a perfect match!
You’re in luck! I am going to introduce you to one of my favorite books to read, focusing on the core vocabulary word “GO”. I am also going to show you examples of how I might read this book with students to provide lots of opportunities for communication partners to model the word “GO” as well as opportunities for students to imitate and/or initiate communication with that word.
Ready? Here we GO!
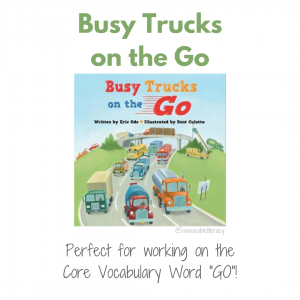
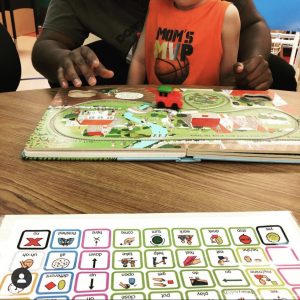
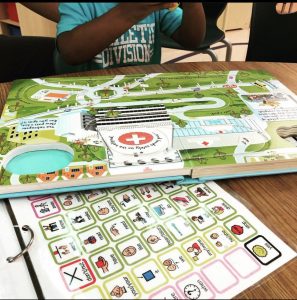
Let me introduce you to “Busy Trucks on the Go” – a picture book filled with engaging scenes featuring various trucks and vehicles that kids may see throughout their day. The illustrations are narrated with simple rhyming text that labels the name of the vehicle as well as providing a clue as to the job the vehicle helps perform within the community. This mix of engaging, colorful illustrations and rhyming, rhythmic text make this book a fun read for kids and adults alike!
Something to note is that the word “GO” is not included frequently within the text and therefore, the reader should not rely on the text alone to provide opportunities for modeling “GO” for students. However, opportunities to model “GO” do appear frequently when looking at and chatting about the illustrations of the trucks and vehicles as well as the adventures of a boy and his dad as they move about town seeing the various vehicles.
Modeling Core Vocabulary while reading…
This book lends itself very easily to engaging in shared reading between an adult and student – sharing observations about the illustrations such as:
Where are the vehicles are “GO”ing?
The cement is “GO”ing out of the cement truck.
Dirt is “GO”ing in the dump truck.
Dad’s truck can not “GO”.
Water is “GO”ing out of the fire hose.
Where are the people are “GO”ing?
Remember…
Follow the lead of your students or whomever you are reading with during shared reading, modeling various vocabulary as you read. While you may be focusing on one core vocabulary word in particular, modeling a variety of words demonstrates that there are no “right” or “wrong” words and that you can say lots of different things about the same picture.
I need this book!
Ready to add this book to your library? Follow the link below to purchase this beautifully illustrated and engaging book:
Busy Trucks on the Go: https://c8314.paperpie.com/p/3737/busy-trucks-on-the-go
Remember – there is no right or wrong way to read a book – just keep reading!

By the way…
P.S. If you are a visual learner or just hang out on YouTube – you can watch this content come to life there: https://youtu.be/2rA-gROzCF0
by Megan | Dec 21, 2020 | AAC, aided language input, aided language stimulation, core vocabulary, modeling, Sensory, YouTube
Are you looking for fun ways to incorporate core vocabulary, early first words and literacy into therapy sessions and/or daily routines but not sure what books to read and/or how to focus on specific words while reading?
Core vocabulary and literacy – a perfect match!
You’re in luck! I am going to introduce you to one of my favorite books to read, focusing on the core vocabulary word “GO”. I am also going to show you examples of how I might read this book with students to provide lots of opportunities for communication partners to model the word “GO” as well as opportunities for students to imitate and/or initiate communication with that word.
Ready? Let’s GO!
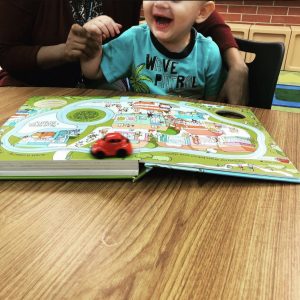
Let me introduce you to the “Busy Train Book” – it’s one book in a collection of Busy Books that include: Busy Car, Busy Helicopter, Busy Bug and one that is released around the holidays, Busy Santa. Each of these books includes a pull back and go vehicle that travels around four various tracks throughout the story book, with each page narrating the travels of the pull back and go vehicle.
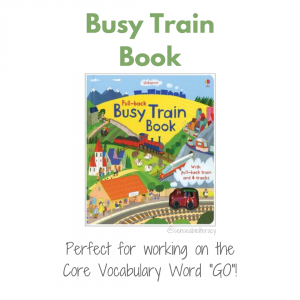
The “Busy Train Book”: Perfect for modeling the core vocabulary word “GO”.

Additional Busy Book Titles including Busy Helicopter, Busy Car, Busy Bug, & Busy Santa
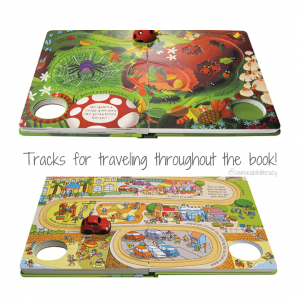
Each book has 4 tracks for traveling throughout the book!
The train in this book, and the vehicles in all the other Busy Books, are highly motivating and provide a built in opportunity to practice modeling and using the word “GO” multiple times on each page which is fantastic for early communicators – you can model “GO” while checking out the scenes around each track without reading the text.
PreK student reading and playing with the “Busy Train” book
PreK student playing with and reading “Busy Helicopter” book.
PreK student playing and reading the “Busy Car” Book
Incorporating Core Vocabulary while reading…
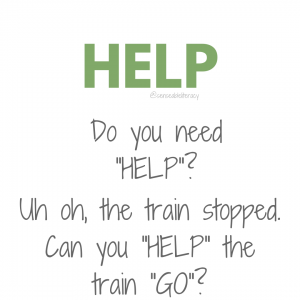
Opportunities to model “GO” are everywhere in the book and starts on the first page where the text encourages the readers to place the train on “start” and let it “GO”!
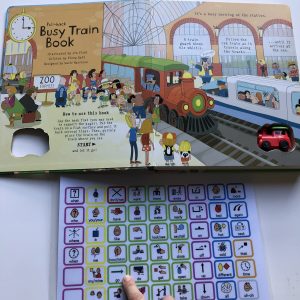
Modeling opportunities start on the first page!
Other opportunities to model “GO” include:
When starting the train on the track, say and model: “READY, SET, GO!”
While the train is moving along the track, say and model: “LOOK AT THE TRAIN GO!”
If the train stops you can say and model “GO” by saying “Let’s make the train GO again!”
The word “GO” is also in the text on 2 of the tracks – this is a natural opportunity to model “GO” while reading the text to build literacy skills.

The word “GO” is featured in the text as well – providing extra opportunities for modeling and literacy.
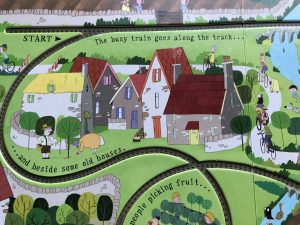
Text featuring the core vocabulary word “GO” provides extra opportunities for modeling and literacy exposure.
But that’s not all!

There are lots of additional Core Vocabulary to model while reading as well!
While this book lends itself to easy and frequent modeling of the core vocabulary word “GO”, there are lots of other core vocabulary words that can be modeled throughout this book, including:
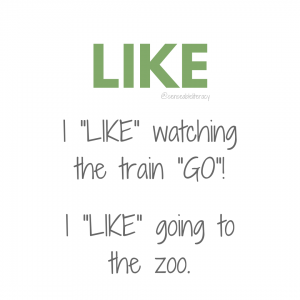
There are many opportunities to model “LIKE” throughout the book!
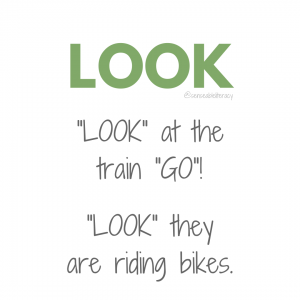
There are many opportunities to model the core word “LOOK” while reading.
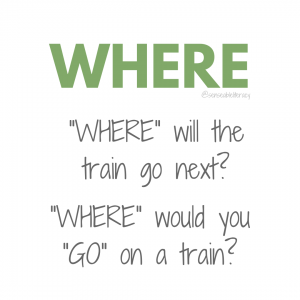
Don’t forget to ask questions while reading and modeling!

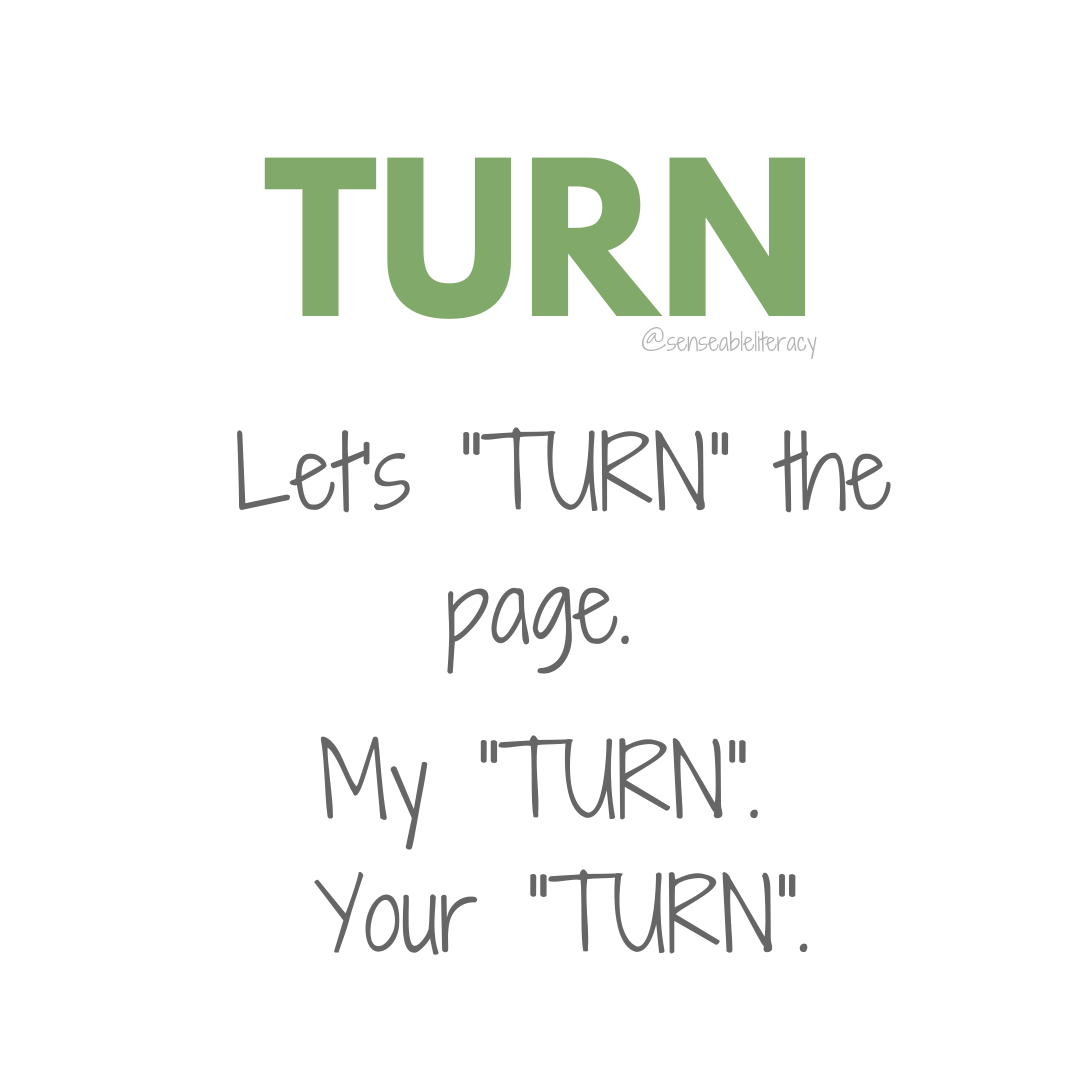
“TURN” is easy to incorporate often while reading.
A great opportunity to practice asking for help!
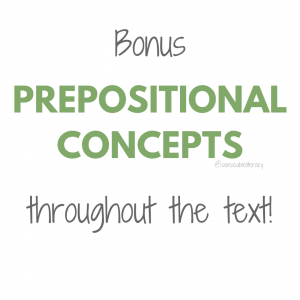
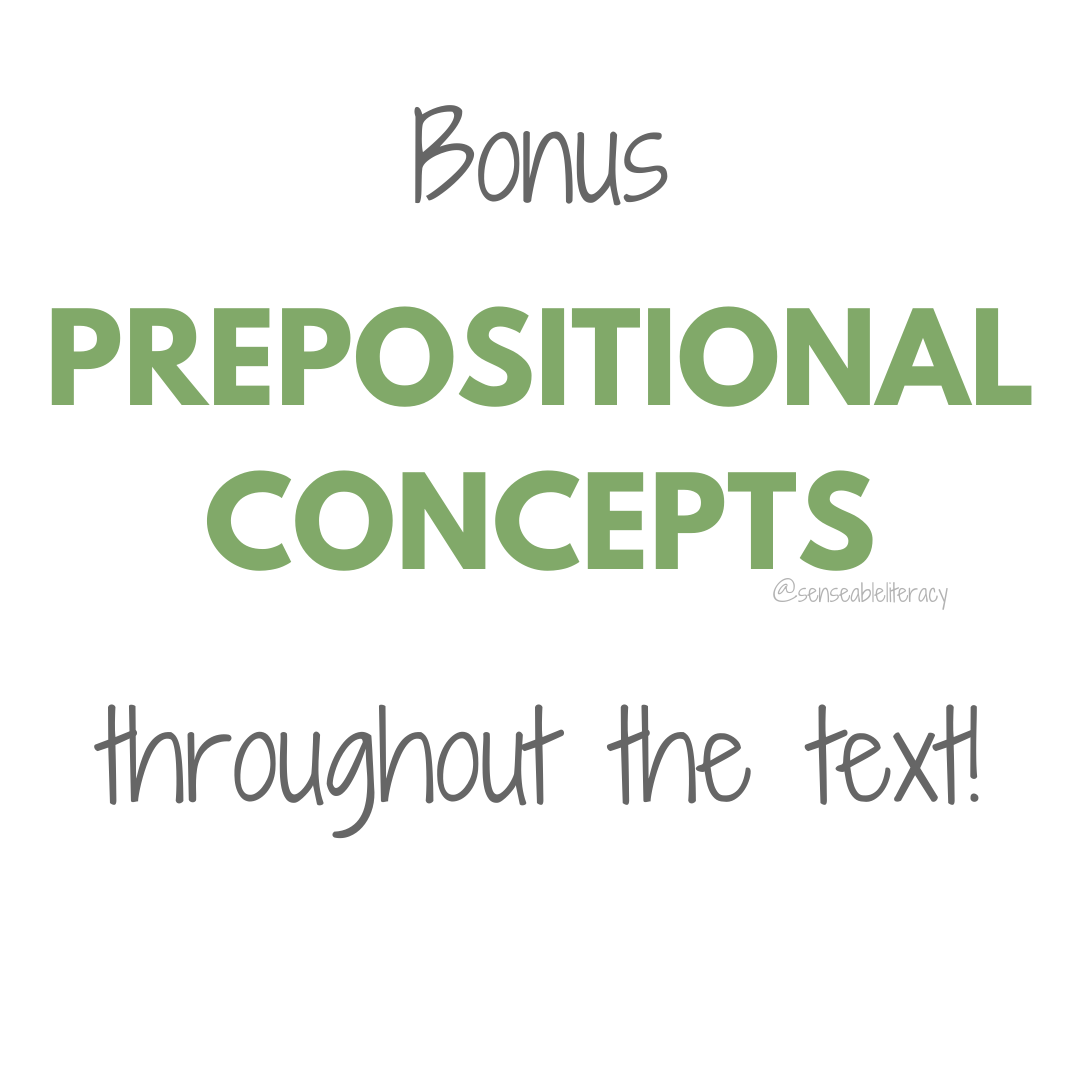
There are lots of prepositional concepts throughout the book to chat about as well!
Remember…
Follow the lead of your students or whomever you are reading with, modeling various vocabulary as you go. The illustrations within the book are beautiful visual scenes filled with lots of different objects, actions and places to explore and chat about!
I can’t wait to incorporate literacy, AAC & play!
Ready to add this book or others from the Busy Book collection to your library? Check them out here:
Remember – there is no right or wrong way to read a book – just keep reading!
Just keep reading!
One final note…
P.S. If you are a visual learner or just hang out on YouTube – you can watch this content come to life there: https://youtu.be/ScWO9dTYmfE
by Megan | Apr 18, 2020 | AAC, aided language input, aided language stimulation, modeling, prompt hierarchy, prompt hierarchy, training, YouTube

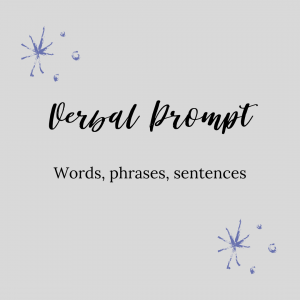
Prompt Hierarchy
Hello again! If you’ve read my other blog posts you should now be familiar with AAC, Core and Fringe vocabulary as well as the “what”, “why” and “how” of modeling language with AAC. If any of this is unfamiliar to you, pause here and head over to my other posts on those topics, to learn or refresh your memory and then come on back to this post.
Now that you are excited and ready to show off your AAC modeling skills and let the world know what a “super-modeler” you are, I have one more tool for you to add to your tool box! This tool is multi-functional and can come in handy in any and all situations where you will be or are modeling core vocabulary and AAC. The tool that I am talking about is the Prompt Hierarchy.
Wait…
I think I may have gotten a little ahead of myself – are you wondering what a prompt is? Let’s take a minute to review that so that we make sure we are all on the same page. Prompting can be defined as: “a strategy used to assist, suggest or cue someone in order to help them learn a new skill” – such as using an AAC system for communication.
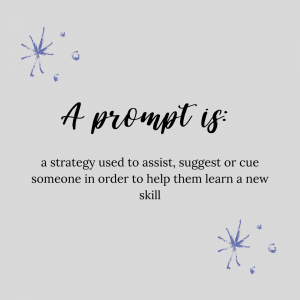
A prompt is: a strategy to assist, suggest or cue someone in order to help them learn a new skill.
We all need prompting to learn a new skill – people were there to help and prompt us to learn to walk, to learn to cook, to learn to drive, etc., – these were not skills that we picked up on our own. We needed someone there to help us along, providing opportunities for increased independence as our skills improved until we were able to do it completely on our own. We can use the same ideas to help our AAC users develop their independence in their communication and use of their AAC system.
We all need prompting to learn a new skill.
If you think about a time that you have helped or prompted someone through learning a new task and you think about the ways that you have prompted them you will probably see that you did so in a variety of different ways.
You probably used some of, or all of these prompts: gestures (e.g., pointing, reaching, showing, etc),

Gestural prompt: reaching, pointing, showing objects
verbal (e.g., words, phrases and/or sentences),
Verbal prompt: words, phrases, sentences
visual (e.g., looking toward items, objects, places, providing something for them to look at/reference, etc),

Visual prompt: looking toward items, objects, places, providing something for them to look at/reference
and/or setting up the environment to encourage the skill be attempted or completed. We can, and should, use the same types of prompts for our AAC users as we facilitate their learning how to use their AAC systems effectively and efficiently.
Ok, now that we are on the same page about what prompting is, the different types and the fact that we all need some every once in a while, let’s chat about the Prompt Hierarchy.
As with core vocabulary communication boards, there are many different versions of Prompt Hierarchies out there, and the one that you use is more of a preference, however they typically include the same steps. The organization of the steps may be a little different however, depending upon the version of the hierarchy.
Oh and don’t let that word “hierarchy” trip you up – it’s just a fancy way to explain how things are organized or ranked.
Throughout this post, this is the Prompt Hierarchy I will be referring to.
Prompt Hierarchy
It moves through various levels of prompting from the least amount of prompting to the most. I will highlight each level of the hierarchy, providing examples of what prompting at this level might look like.
Important points
It is important to know that you may work through this hierarchy in its entirety multiple times within an activity and that’s ok. We are not expecting a student to learn a new skill and how to complete it independently after a single exposure. It may take many times before students start to demonstrate the ability to complete part or all of the task themselves. Another important aspect of this hierarchy that I want to make sure is highlighted is the emphasis on providing wait time between each level of prompting.
Sometimes, AAC users need increased time to think about, process and comprehend what they hear and see. Therefore, it is vital that we intentionally provide time for the students to process the information that is presented to them and give them a chance to give some information back in the form of actions, words, etc before we move forward. This will be demonstrated as we move through the explanation of each step within the hierarchy.
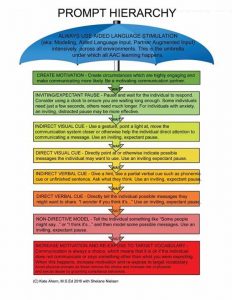
Always use modeling: intensively and across all environments – this is the umbrella under which all AAC learning happens.
At the top of this hierarchy is an umbrella stating “Always Use Aided Language Stimulation” or “Modeling”. The umbrella image signifies that this skill, of modeling language using AAC, is the umbrella under which all AAC learning occurs and that modeling language via AAC should be happening all day, every day and throughout each step of the prompt hierarchy.
Step One
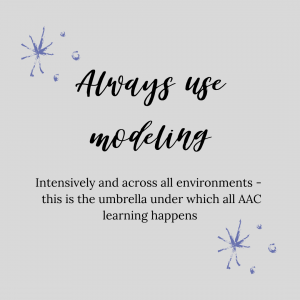
The first step of the hierarchy, which uses the least amount of prompting, is “Create Motivation”.
Create motivation: create engaging circumstances to promote communication. Be a motivating communication partner.
Within this step, our job as the communication partner is to create environments and activities that are highly engaging and motivating for the student. When students are engaged and motivated they are more likely to want to interact and/or communicate.
This motivation does not have to be only within the physical environment or with a physical item. It can also be with you, solely as the communication partner. Yes, you can be motivating and engaging, without anything else, just you. More stuff doesn’t always make things more motivating for students.
So, after you have created motivation and engagement for your students to encourage them to communicate – what do you do?You WAIT! I recommend counting, slowly and in your head, for at least 5-15 seconds or more (some studies suggest waiting up to 45 seconds) to provide the student the extra processing time that they may need.
If the student doesn’t initiate communication after you have provided ample wait time or if during the waiting time period it seems as if they are becoming disinterested in the activity, continue on with the next step in the prompting hierarchy.
Step Two
The second step within the prompting hierarchy focuses on increasing the wait time that you provide for the student while still encouraging them to communicate or respond to your communication attempts through providing an “expectant pause”.
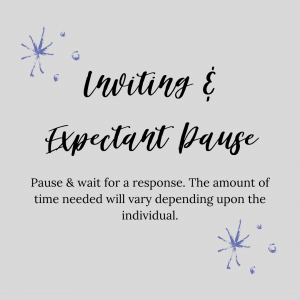
Inviting & expectant pause: pause & wait for a response. The amount of time needed will vary depending upon the individual.
This might look like, showing the student their favorite snack or toy in a closed container or in a place that is out of reach, looking at the student, looking at the snack and then looking back towards the student. When you look back towards the student the last time, this is when you give the “expectant look”. An expectant “look” often looks something like this: “eyebrows raised, wide eyes and a smile”.
After the addition of this step – guess what you do? That’s right – you wait again – remembering that waiting is giving your student’s important time to process and think.
Step Three
The third step within this prompting hierarchy is providing an indirect visual cue.
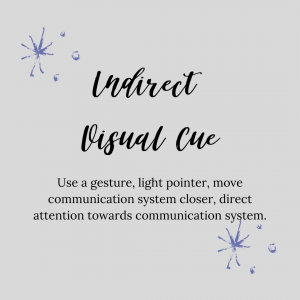
Indirect visual cue: use a gesture, light pointer, move communication system closer, direct attention towards communication system.
This would look like you, as the communication partner, pointing to the communication system, moving the communication system closer to the student, or in some way, visually gaining the attention of the student and moving that attention towards the communication system. This step is paired with an expectant pause and look, that was described before as well.
After this step, wait to see if the student responds and initiates communication. If not, proceed onto the next step in the hierarchy.
Remember, as we are progressing through these steps we are gradually moving from providing the least amount of prompting, promoting the most independence for the student, towards increasing the amount of prompting to help the student successfully initiate and/or complete the skill they are learning, in this case, using their AAC communication system.
Step Four
The fourth step in the hierarchy is to provide a direct visual cue for the student.
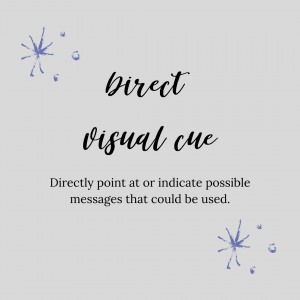
Direct visual cue: directly point at or indicate possible messages that could be used.
This is where you show the student possible messages that they could use within the activity, environment, etc.This can be done through physically touching various symbols on the communication system, hovering your finger around certain symbols or areas on the communication system that you feel could be messages that the students might want to use and/or communicate. Again, this step is paired with an expectant pause and look as well as,-you guessed it,- waiting time for processing and thinking by the student.
Step Five
The fifth step is providing an indirect verbal cue.

Indirect verbal cue: give a hint, use a verbal cue or unfinished sentence, ask what they think.
Indirect verbal cues can be hint, such as “What do you w___?” to ask the student what they want, while pointing to, or near, the symbol “want” on the communication system. Another example of an indirect verbal cue can be an unfinished familiar sentence or phrase such as “Ready…Set…____” and leaving wait time and an expectant look for the student to attempt to fill in the last word to complete the sentence or phrase.
I just mentioned it again but I bet you are sensing a pattern by now. After this step, make sure you leave some wait time before moving onto the next step to see if your student will initiate a communication interaction.
Step Six
The sixth step is a direct verbal cue and involves directly telling the student possible messages that you think they might want to share that are applicable to the activity/environment.

Direct verbal cue: provide possible messages that could be shared – “I wonder if you think it’s…”
This can be accompanied by saying things like “I wonder if you think it’s ____” and then modeling on the communication system different options that the student could use within the activity, routine, environment, etc. This is, as always, followed up with and paired with wait time and an expectant look.
Step Seven
The seventh step in the hierarchy is the non-directive model.
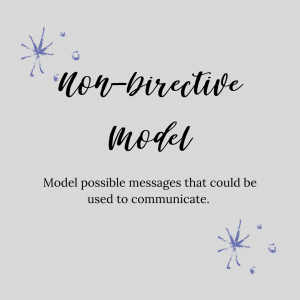
Non-directive model: model possible messages that could be used to communicate.
This is where you share some possible messages that the student could use to communicate within the activity, routine, etc. These are non-directive models in that we are not telling the students to “Say _____” or “Touch ___” on their communication system. We do not want to tell our students what to say, we just want to give them examples of things they could say. You can model these words or phrases on the communication system in a non directive way through saying things like “You could say ___”, or “I want to say ____” to provide examples for the student of how they could use the language of their communication system within that activity. After providing these models, you again wait to see if the student may imitate the model you provided or if they will initiate their own communication interaction.
Final thoughts
Notice I didn’t mention hand over hand assistance as we moved through each step. Taking a student’s hand and moving it for them to touch and/or activate the communication system is not advisable. The strategy of actively modeling language via AAC for students has been proven, through research, to be more effective than hand over hand and physical prompting.
We want AAC users to know that their voice is theirs and that they are free to communicate whatever they want. By taking their hand and physically leading them to what to say, it can be interpreted that we are telling or directing the AAC user as to what they need to or should say.
The strategy of actively modeling language via AAC for students has been proven, through research, to be more effective than hand over hand and physical prompting.
If you have moved through the entire hierarchy and the student has not yet imitated or initiated any communication attempts – that is OK! Remember the umbrella that is over this whole hierarchy – the strategy of modeling language via AAC! Throughout every step, you were modeling and providing aided language input for the student – you were demonstrating ways that they could communicate throughout the activity. Remember that modeling is about what we as the communication partners do and not about what the students do.
And guess what? If the student did not communicate or attempt to communicate after you have moved through each step, you can try again! You can re-introduce the activity, increasing the motivation within the activity and expose the student to the targeted vocabulary again. Another option is to introduce a new activity and move through the prompt hierarchy within that activity as well.
I want to leave you with this – to communicate or not is always a choice – we can not and should not try to force anyone to communicate. It is perfectly fine if they don’t want to communicate or if they say something different than what you were expecting. Expect the unexpected and honor all communication attempts!
Now what?
Now that you have added this new tool to your toolbox make sure you use it! A copy of the prompting hierarchy referenced throughout this post can be found here for you to save, print and share. As always, if you have any questions at all, please feel free to reach out via email or in the comments below. Don’t forget to subscribe to the SENSEable Literacy email list to be notified of new blog posts, videos, and more!
The content of this post can also be found in video format here: https://youtu.be/n7hx7KeP9JI
by Megan | Apr 8, 2020 | AAC, core vocabulary, modeling, training, YouTube
Modeling Language with AAC
In this post, we are going to talk about a very important strategy that all communication partners for emergent AAC users should use, that goes by many names. Some of these names are modeling, aided language input, and aided language stimulation. They all mean the same thing, it’s really more of a preference as to which word you use. Throughout this post, I am going to use the term “modeling”.
Now, if you are thinking, what is that AAC thing that she was talking about? Pause here and go back to read this post – “Introduction to AAC, Core & Fringe Vocabulary”. After you read that post you will have a better understanding of the basics of AAC and therefore be able to gain more information from reading this post.
What is Modeling?
Ok – the first question you probably have is “What is modeling?” No, it’s not walking around on a catwalk and it has nothing to do with fashion. As opposed to that kind of modeling, this is the type of modeling that anyone can do! Yes, now is your turn to be a Supermodel!
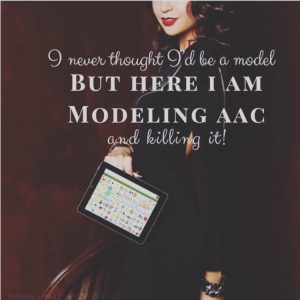
I never thought I’d be a model but here I am modeling AAC and killing it!
Simply put, modeling with an AAC system is pointing to symbols in a communication system as you verbally say a word. Pay attention to those words, we are only talking about what we as the communication partners are doing and not about what the student is doing. The focus of modeling is on what we are providing to the students. There are no expectations for the student – except for their presence. That’s it! As long as the student is present, we can model language for them.
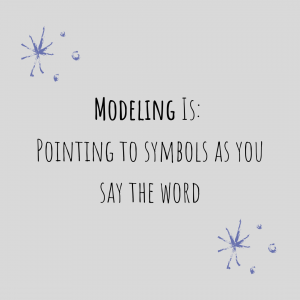
Modeling Is: Pointing to Symbols As You Say The Word
The focus of modeling is on what WE are providing to the students. There are NO expectations for the student – except for their presence.
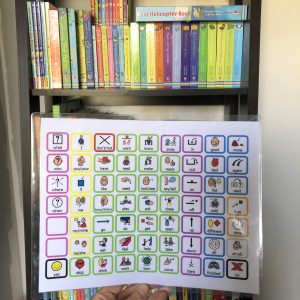
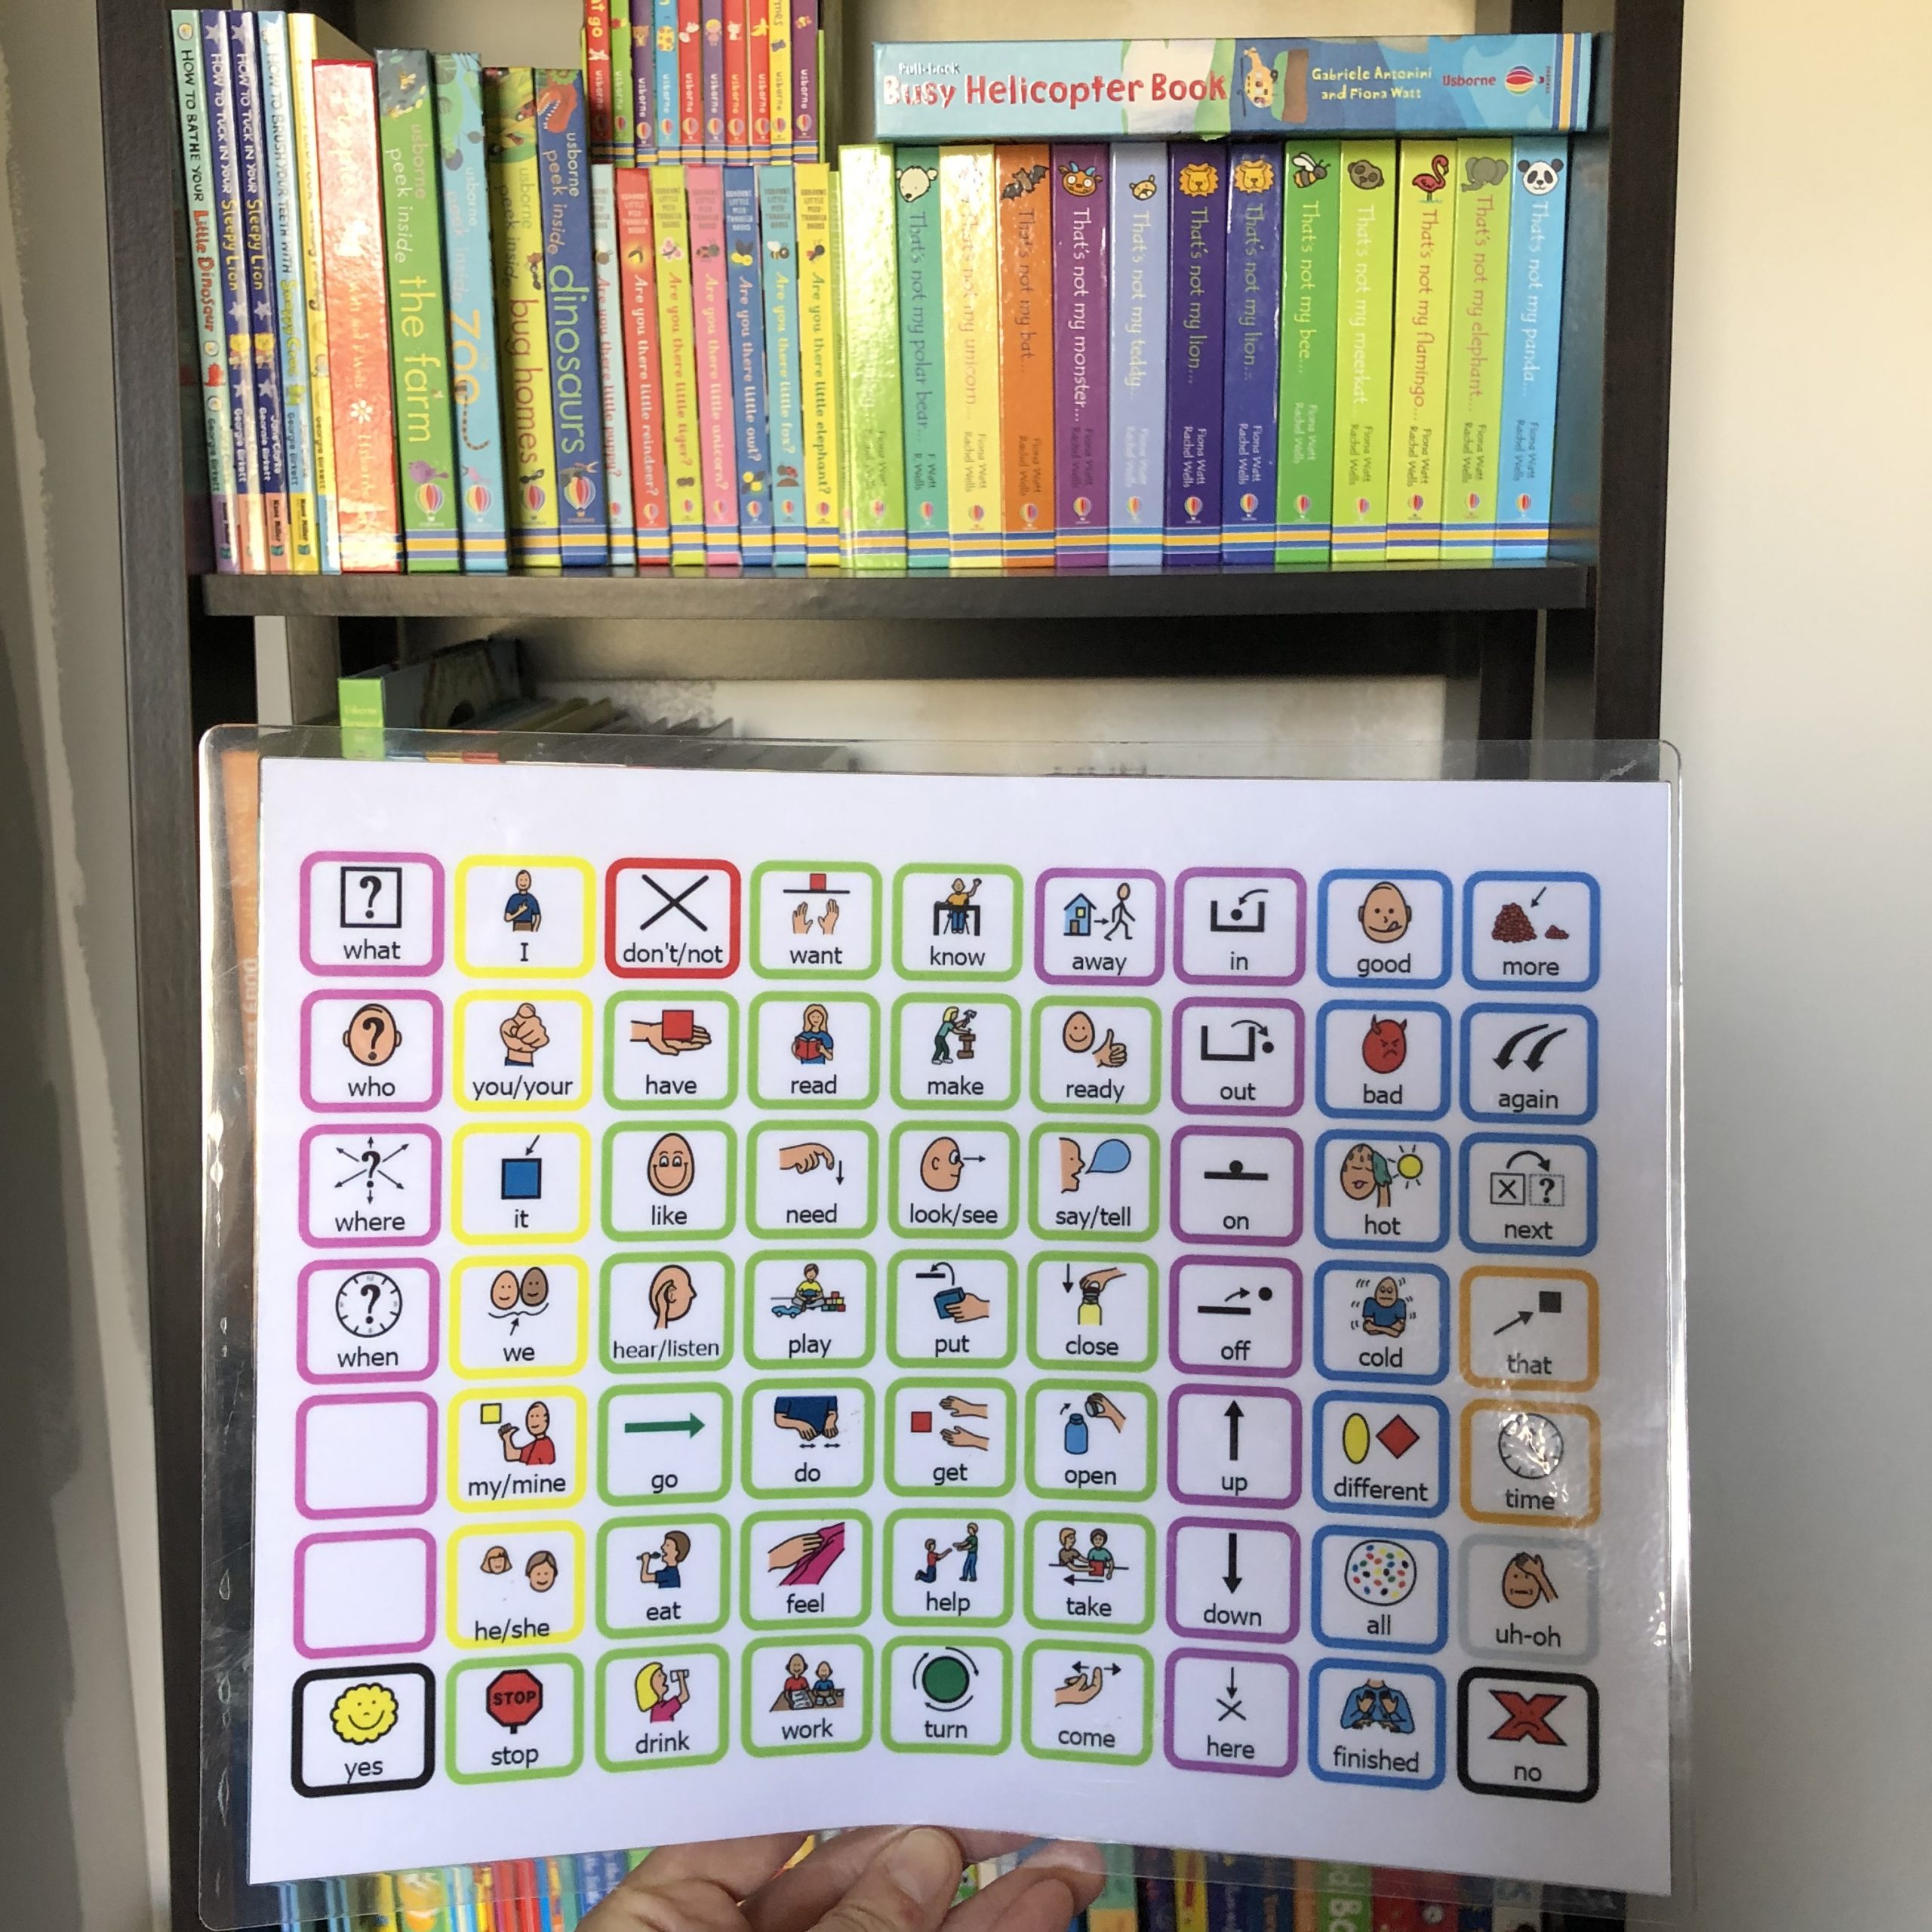
If you’ve ever seen a core vocabulary communication board or any AAC system, you have seen these fun, often colorful, pictures, called symbols, with words underneath them, arranged in a grid – like this.
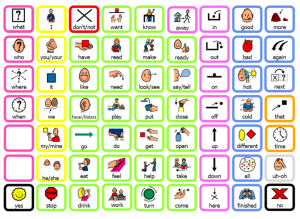
Example of a Core Vocabulary Communication Board
This is an example of a core vocabulary communication board. For our AAC users, learning how to use these symbols to communicate is similar to us learning a new language.
Why do we need to model language?
I don’t know about you but if I am learning a new language, the addition of pictures or some way to visually show the word I’m learning, will help me learn and remember the word for future use. The addition of pictures also activates another mode of learning through making language visual which often helps students learn and remember what various words mean. Learning to use symbolated language is similar to learning a new spoken language.
In order to teach our students how to use this new language system of symbols we have to teach them how to use the system by using the system that they are using. Now, these core vocabulary based AAC systems may not look confusing and may be clear for us as communication partners, however we are able to read the labels underneath the words to ensure that we know what the pictures are representing.
We have to teach them HOW to use the system by USING the system that they are using.
If we took the words or labels away and just left the pictures, do you think you’d be able to know what the pictures represented? Some probably yes, as they are easily represented in pictures such as the “stop” sign as well as “eat” and “drink”. However, others are much more difficult to “symbolate” or turn into pictures, such as “more”, “all”, “do”, “turn”, etc. So, if we don’t teach our students what these pictures and symbols represent, how can we expect them to understand what the symbols mean, much less use them to communicate with us? This is why we need to use, and talk to students with, their AAC system!
How do I model language?
So, now that we know what modeling is and why we need to do it, let’s talk about how to model language on AAC systems for our students. The first thing I want you to know is that you should continue to speak to the students as you normally would. You can and should continue speaking to students in phrases and sentences as you have been, there is not a need to only verbally say the words and symbols that you are pointing to and modeling.
With that said, it is most beneficial to model one word above what the student is currently able to use independently. What that means is that if a student is not yet using or initiating any communication via symbols and/or AAC, you should only model one word/symbol for them. If a student is independently using one word/symbol to communicate via AAC, you can then model two words for them to help expand their symbol use for communication.
Feeling Overwhelmed?
If you are feeling overwhelmed with all this information, let me assure you and remind you that you can do this! Do not worry about doing it “wrong” – there is no right or wrong words to model on any AAC system. Modeling any words is better than modeling no words.
In fact, you can model different words every time you engage in an activity! For example, during book reading, during one reading you can model the words “turn”, “look”, “like”, “I”, etc and on another reading of the same book, you could model the words, “my”, “you”, “more”, “again”, “yes”, etc. Both readings are equally important. That’s one of the wonderful things of core vocabulary based AAC systems – you can model a variety of words and all are appropriate!
Modeling ANY words is better than modeling NO words.
Another worry of some that are not yet familiar and/or comfortable with modeling words/symbols is that they don’t know where all the symbols are within the AAC system. That’s totally ok – and normal!
I am familiar with many different AAC systems and I still have difficulty finding symbols sometimes. There is not need to wait until you know where all the words/symbols are before you start modeling. If you do that, you will never start modeling language for your students!
When you find yourself in the situation where you can’t find the word/symbol that you are looking for, talk through the process you are using to find the word aloud – so the student can hear you. I often say things like: “I can’t find ‘play’. Where did that word go? Hmmm…” while I’m saying this, I am scanning the board, tracking with my index finger as if I am pointing. Then, when I find the word/symbol I am looking for, I say, “Oh! I found it, there’s ‘play’” and then I restate what I was going to say – for example “Do you want to play?”
Talking through your strategy to find the word that you are looking for helps the kiddo/student to know that they are not alone if they do not know where all the words/symbols on their AAC system are. It also teaches and shows them that they don’t have to be perfect and that it’s ok to make mistakes, everyone does.
If you are still overwhelmed, try this – pick one word/symbol from the core vocabulary AAC system that your student uses and model that one word/symbol as often as you can throughout the day. When you feel comfortable with that word/symbol you can then change to a different word/symbol to model. I know that as you continue to practice modeling, you will become more comfortable with it and will be modeling a variety of different words/symbols before you know it!
Hopefully, by this point, you are feeling more comfortable with what modeling is, why we should use it and how to use it. To wrap things up, I want to touch on some questions that are frequently asked when I teach on this topic.
Frequently Asked Questions:
Who Should Be Modeling Language On Students’ AAC Systems?
Everyone! All people that the student could possibly communicate with throughout their day should model language! Adults and children, teachers and peers, siblings, parents, aunts, uncles, grandparents, cousins, etc. Anyone that would or does normally talk to the student, should continue to do so, with the addition of modeling the words they are saying on the student’s AAC system. This helps student’s learn that communication happens everywhere with everyone and is not an activity that only happens with certain people.
Where Should We Model Language?
Everywhere! Just as we are encouraging the student to communicate with everyone – we should also be encouraging them to communicate everywhere they go! We are able to communicate wherever we go and so should our AAC users! You can help make this easier through ensuring that the student has access to their AAC device/system wherever they go. This could be through the student taking their device/system with them, or having multiple copies of their communication system in various locations throughout their day for easier access.
What If They Aren’t Looking At The AAC System When I’m Modeling?
It’s ok! Even if they don’t seem like they are looking or listening – keep going, you will be amazed at what they are picking up, hearing, etc! Some students may be looking out of their peripheral vision or in a way that’s not obvious. They may look when you look away, which means that you would most likely miss seeing them look. This could be for various reasons, for example, some students may have difficulty looking at, listening to and processing information all at once – it’s too much of a strain on their sensory systems. They may need to look, listen and attend at different times to help increase their attention and comprehension. The biggest thing to remember is that we don’t have to wait for the student to look at the symbol/word before we model that word/symbol. If we do that we will miss many opportunities to model language for our students. “If we wait for the look, we will never get to the language!”
What If They Won’t Let You Model On Their Device, Core Board, etc?
Honor that – it’s their language system. If we want to instill a sense of ownership in the student with their AAC system, (and we do) we need to teach and show the student that their AAC system is theirs and that they are able to make choices about who uses their system and who doesn’t.
To combat this and ensure that we are still able to model language for our students throughout their day, it is important to have an additional version of the student’s language system – you will most likely have to make a paper version of a digital device – to model language on.
Another option is to see if they will let you “point” to model without touching their device/core board – hovering your finger over the symbols or use a laser pointer or finger light to model without touching their system.
Now that we have reached the end of this post, I hope that you feel much more comfortable with modeling – what it is, why we use it, and how to do it. If you have any questions about modeling, please feel free to reach out via email or through posting your question in the comments below.
If you’d like to see some examples of modeling within AAC systems, check out the videos posted on the SENSEable Literacy YouTube channel!
The content of this post in video format can also be found here: https://youtu.be/cbiiWv9fxjo


Recent Comments