by Megan | Feb 10, 2021 | AAC, aided language stimulation, core vocabulary, modeling, Sensory, Sensory extension activities, Storybook Sessions
Storybook Sessions: Garrett Morgan
In each Storybook Sessions post, I highlight a book that I have used, or plan to use in therapy as well as associated, extension activities that can be paired with the book to increase vocabulary comprehension, provide opportunities to express yourself verbally, written, creatively, etc., sensory exploration, fine motor practice, gross motor movements, etc. Some extension activities will focus on all of these components while others will focus more specifically on one area.
Garrett Morgan
Author: Megan Stewart
Illustrator: Symbols by Boardmaker 7
Do you ever have an idea for an activity to do, book to read, etc but can’t find exactly what you are looking for? Anyone else, or is it just me?
This happened to me while I was planning for my February sessions. I knew I wanted to highlight a famous black person from history to celebrate Black History Month with my students but while looking for a book to lead my activity/session, I wasn’t able to find what I was looking for. I will say that there are a TON of great kids books featuring and highlighting famous black people, however I waited too long to put these on hold or check out from my library, so I decided to create my own.
My Book Creation Process
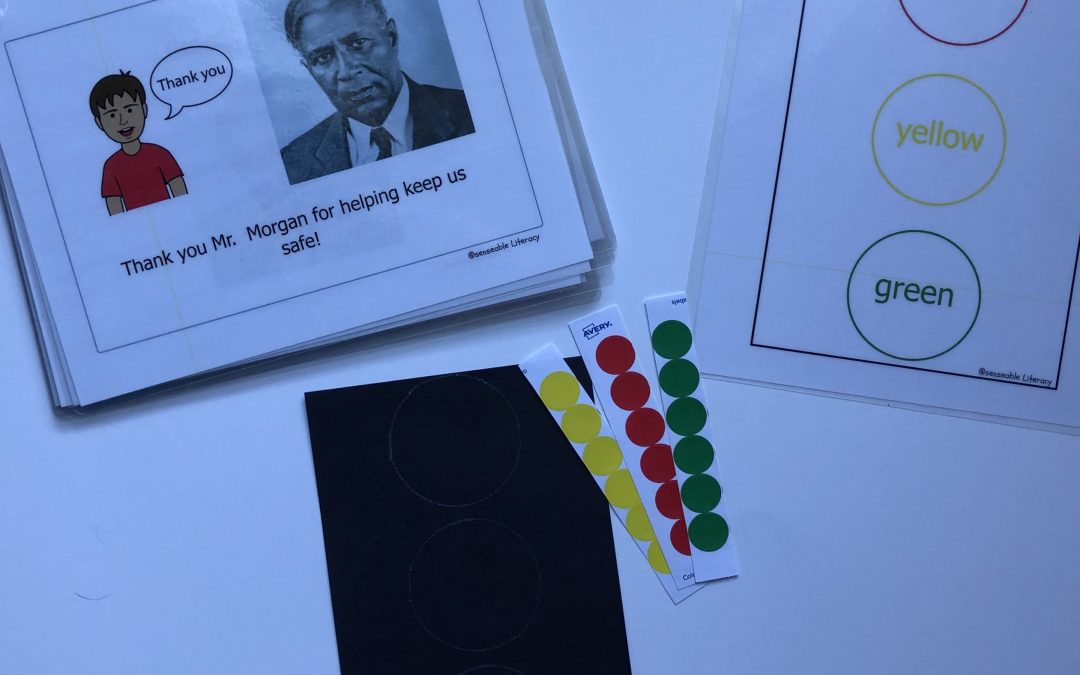
I chose to highlight Garrett Morgan, who added the yellow light to the stoplight as we now know it, within my lesson. With a quick Google search to find a picture of him, and learn a little more about him and his inventions, I took that information, opened Boardmaker 7 software and got to work! Using the printable book template, I was able to easily add in pictures, symbols and text that told the story of who Garrett Morgan was, why we need to learn about him, what his invention was (Mr. Morgan did invent items other than the stoplight, (i.e., the gas mask), but I thought this invention was most appropriate to highlight for my PreK students), and how it has affected our world. Here’s a sneak peek of the book:
Now What?
Now that I had the book, I needed to decide on the extension activities to continue our learning after we read the book. I chose activities that focused on color, shape and number recognition & labeling, spatial concepts, fine motor skills, bi-lateral (both sides) hand coordination, sorting, following directions, and gross motor skills.
Creating A Personalized Stoplight
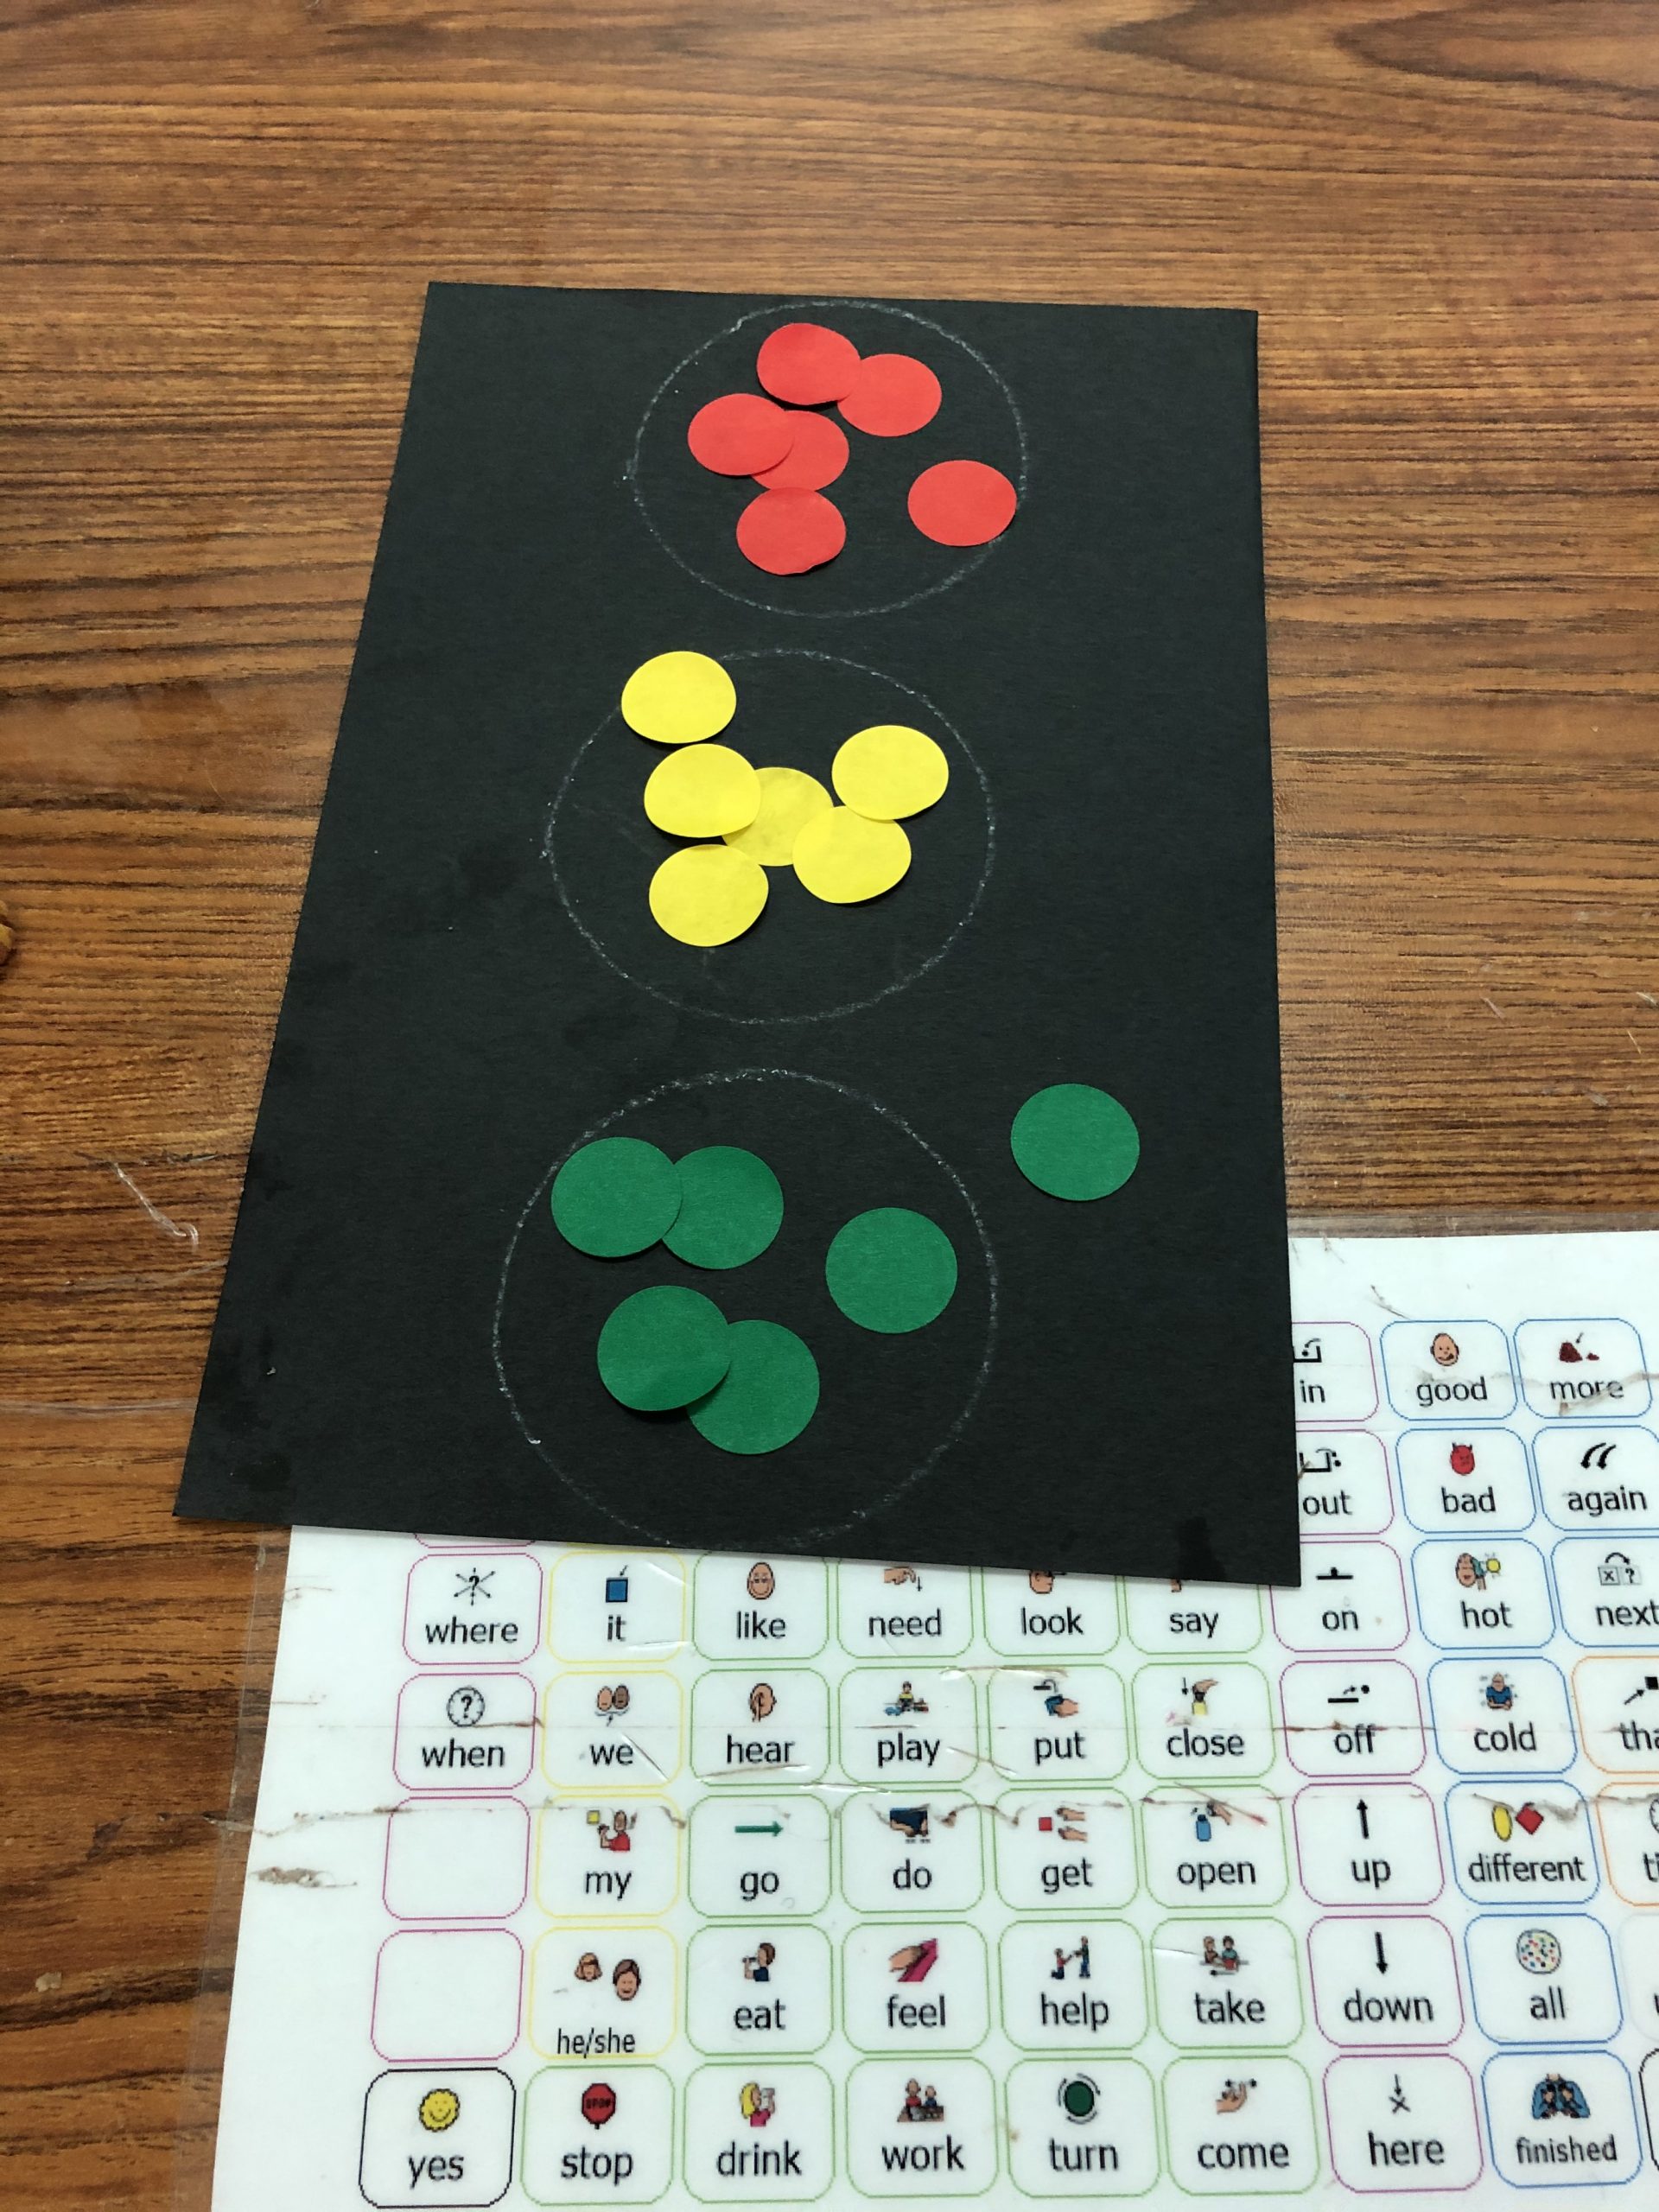
In the first activity, the students create their own stoplight.
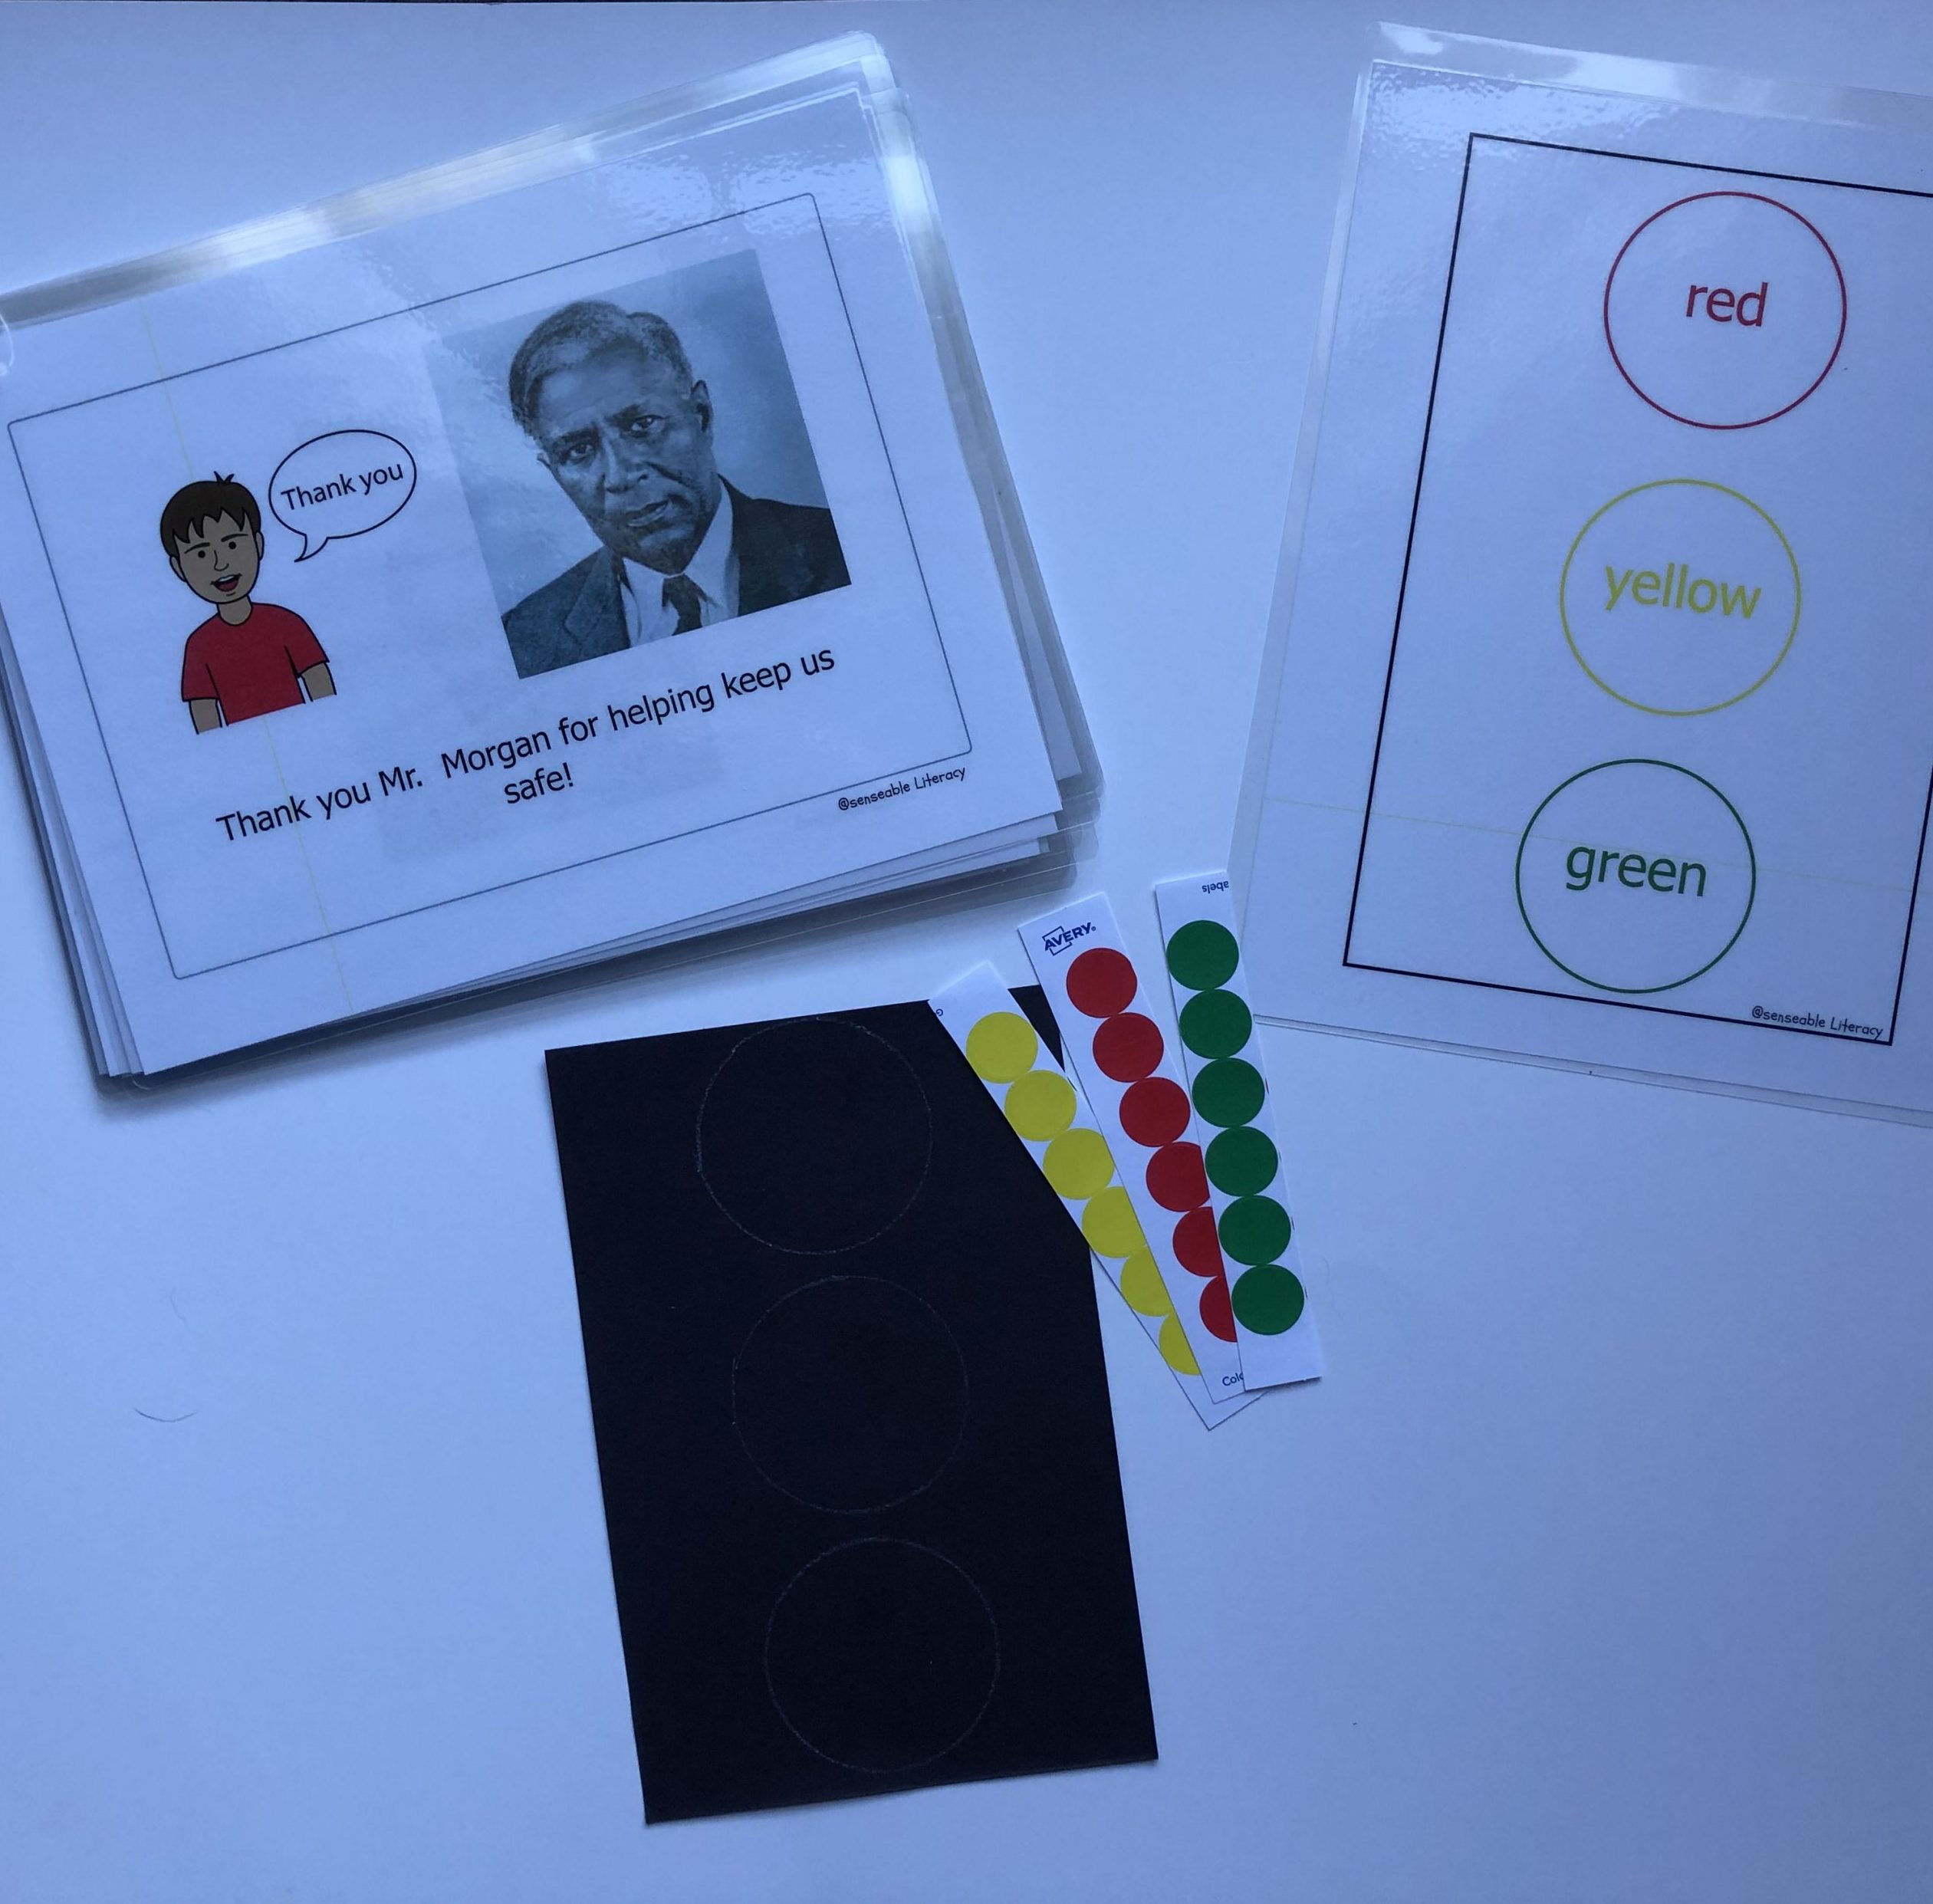
First, I cut black construction paper into rectangles and drew 3 circles down the center with a white crayon.
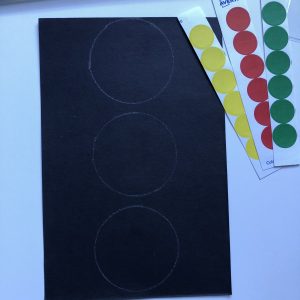
Stoplight template and stickers
Second, I cut color coding stickers from Avery into strips of yellow, green and red.
Each student was given a stoplight template and, after a model from an adult, placed all of the colored stickers onto their stoplight template. Hopefully the students placed the stickers in the right place based on color, but if not, that’s ok too – I am all about fostering independence and creativity and this is not a test!

Student Created Stoplght
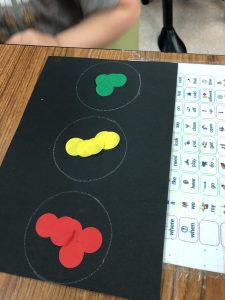
Student Created Stoplight
Additional Skills Addressed While Creating the Stoplights
While the students were making their stoplights, we were able to focus in on the topics of:
- Colors
- Shapes
- Location words (prepositions)
- Quantity (numbers, more, less)
Don’t forget all the Core Vocabulary!
And of course we used our core vocabulary communication boards to chat, modeling words, individually and in short phrases, such as:
- Put
- On
- More
- Where
- Help
- Want
- Like
- Not
- Different
- I
- My
- You
- Finished
- Here
- That
- Again
- Next
- See
- All
The Fun Doesn’t Stop There!
After students finish their stoplight you can:
- Help them write their name on their paper and send home to share with families.
- Laminate their stoplight to use in additional extension activities such as sorting by color.
- Use this sorting template to find items that are red, yellow and/or green in their environment.
- Watch some fun “stoplight videos” such as:
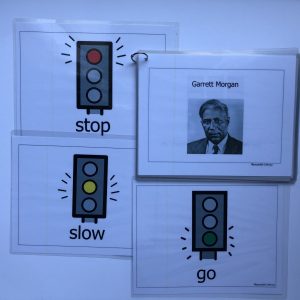
- Play “Red Light, Yellow Light, Green Light” to help get the wiggles out. You can use these visuals to further show students if they are to “GO”, “SLOW” or “STOP”.
- Play with cars and other vehicles, using your traffic light to tell the cars to “GO”, “SLOW down” or “STOP”
This Sounds Great! Where Can I Find These Resources?
If you are interested in doing these activities and/or reading the book about Garrett Morgan to your students I have linked them here for you to download:

Garrett Morgan book and activities
Garrett Morgan Printable and activities
If you create stoplights in celebration of Garrett Morgan and his invention, I’d love to see it!
Post pictures in the comments below or tag me (@senseableliteracy) in posts online!
Until next time – Happy Reading!

by Megan | Nov 29, 2020 | AAC, core vocabulary, fringe vocabulary, Sensory, Storybook Sessions
Storybook Sessions: “That’s Not My Snowman”
In each Storybook Sessions post, I highlight a book that I have used, or plan to use in therapy as well as associated, extension activities that can be paired with the book to increase vocabulary comprehension, provide opportunities to express yourself verbally, written, creatively, etc., sensory exploration, fine motor practice, gross motor movements, etc. Some extension activities will focus on all of these components while others will focus more specifically on one area. Books and all materials are linked as well to provide easy online shopping so you can easily gather materials to replicate these activities and enjoy them yourself. (Simply click on the title of the book and/or material listed and you will be redirected to an opportunity to purchase and/or learn more)
Author: Fiona Watt
Illustrator: Rachel Wells
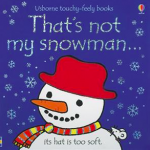
“That’s Not My Snowman”
This book, like the others in the wildly popular, “That’s Not My…” series, features various textures and sensory elements via touchy-feely patches on each page. The story line also features a simple, repetitive text: “That’s not my snowman, it’s ____ is too ____.” This repetitive line promotes basic, emergent literacy and language skills for readers, providing multiple opportunities to see and hear familiar words which will in turn, increase their comprehension and recognition of these repeated words. The various items that are featured and described in the repeated line are those that contain the different touchy-feely patches on each page (e.g., “…it’s hat is too soft.”). Featuring and describing these items provides the reader with opportunities to increase their receptive vocabulary through identifying the labeled items (nouns) as well as describing how they feel (adjectives).
As readers become more familiar with the text and associate the feel of the various sensory elements with the descriptive vocabulary provided, they will have the opportunity to use this vocabulary in their own expressive communication as they read the book and/or describe various items they interact with throughout their day. An added bonus for students who are emergent language and literacy learners, who may also be using Augmentative and Alternative Communication (AAC) is that this book is full of core vocabulary that can be modeled on a communication device/system. Examples of core vocabulary within the book include: “that”, “not”, “my”, and “it” as well as the multiple opportunities to model “turn” for turning the page, “help”, “feel” for exploring the touchy-feely patches, “you” and “I” and so many more!
As you can see, there are so many reasons that this book is a no-brainer to use within my language therapy sessions but it’s a great book to read with any emergent reader and language learner to help build and refine their literacy and language skills. Reading books like this become even more fun when you pair reading with a fun, sensory based extension activity like these fun sensory snowmen.
Simple, cheap and fun = win, win, win!
Sensory Snowmen
All you need for this simple, fun, sensory extension activity is:
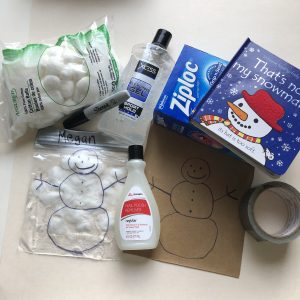
Materials needed for sensory snowmen extension activity.
Step 1:
- Remove the label on the resealable zipper storage bag(s) with nail polish remover. (This really works – promise! I was a skeptic too but was shocked at how easy it was to remove!)
- Dry nail polish remover residue from bag.

Nail polish remover removes labels from resealable storage bags
Step 2:
- Draw a template of a snowman on a piece of cardboard using a permanent marker.
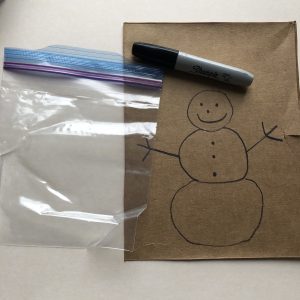
Draw a snowman template on piece of cardboard
Step 3:
- Place resealable zipper storage bag on top of snowman template & trace onto bag with permanent marker.
- You can also encourage kids to draw their own snowman on the bag – be creative!
Place resealable storage bag over snowman template.
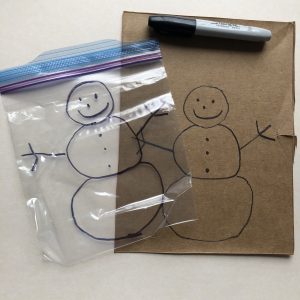
Trace snowman template onto resealable storage bag or let kids draw their own snowman.
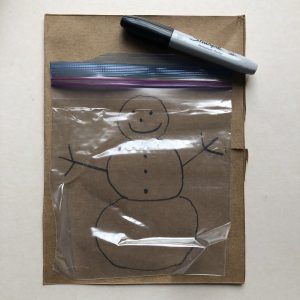
Step 4:
- Place a few cotton balls inside of the bag (number of cotton balls will depend upon how full you want your bag to be as well as how big your bag is).
Step 5:
- Squeeze hair gel into the bag until cotton balls are able to be pushed around when in contact with the gel (again, the amount of gel needed will depend upon the size of the bag as well as how many cotton balls were used – not an exact measurement).
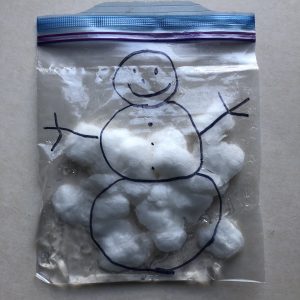
Put cotton balls and hair gel into resealable storage bag.
Step 6:
- Seal bag and reinforce with duct tape (may need to reinforce on both sides of seal to ensure closure).
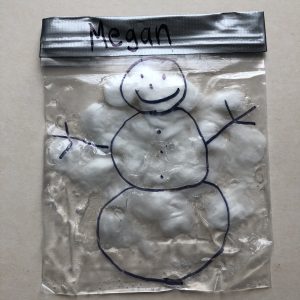
Reinforce seal of resealable storage bag with duct tape and label with name.
Step 7:
- Use a permanent marker to label the bag with the name (of snowman or kiddo).
- Encourage kids to write their own name to practice emergent writing skills.
Step 8:
- Enjoy moving the cotton ball “snowballs” around within the bag to personalize the look of your snowman over and over again!
- Re – read “That’s Not My Snowman” again – while students play with the sensory snowman bags that they just created!
There are a lot of ways that you could personalize this activity even further, such as adding additional sensory elements to the bag such as sequins, small snowflake confetti, glitter, etc. – Have fun and be creative!
If you create Sensory Snowmen bags with your students, I’d love to see them! Share pictures in the comments here or tag me (@senseableliteracy) in your posts online!
Until next time – Happy Reading!

Recent Comments