by Megan | Dec 10, 2023 | AAC, blog
Names are important!
However, just like words, the pronunciation of some names can not be determined by spelling alone. Various things like accents, pronunciation of sounds, and influence from the sounds around it can influence how we say a person’s name. Therefore, the only way to truly know how to say someone’s name is to ask them. 
I can hear you now, “But, what if they can’t talk yet or they use a different way to communicate?” and you’re right. If the learner is too young to say their name, you can ask a family member or someone close to them to know how to say their name. But what if there is no one there to tell you how to say their name and/or they are non-speaking? That makes things a little more challenging; however, using a high-tech AAC system should allow the user to share their name with communication partners – we just have to make sure that the system knows how to say their name.
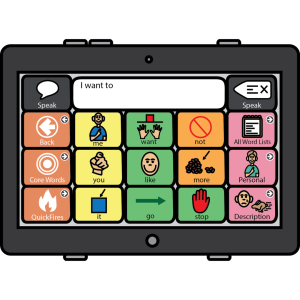
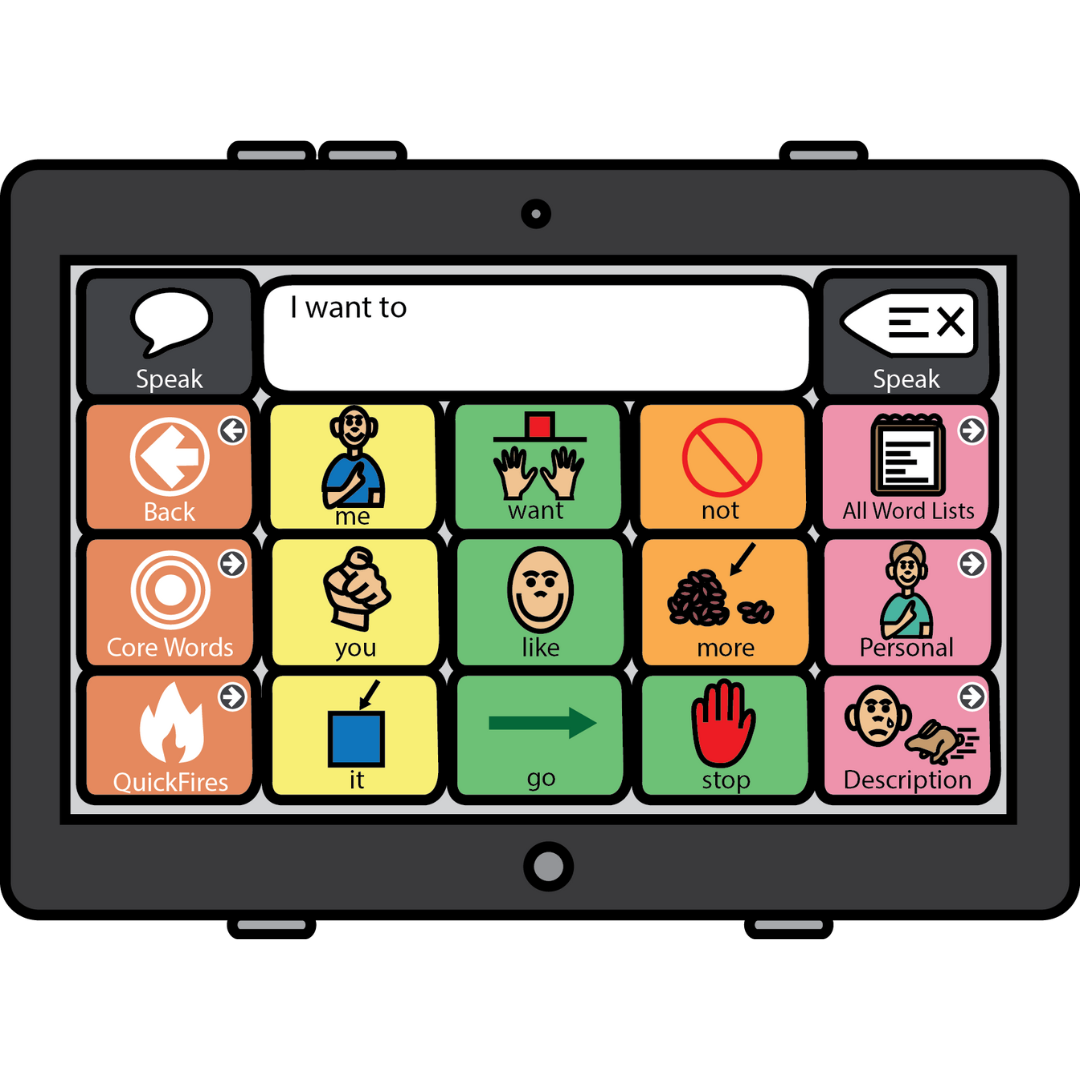
That sounds simple enough. At first thought, you might think, “I’ll just type the user’s name into a button and we are all set.” – sometimes it is that easy – but sometimes it’s not. We all know that not all names are pronounced the same as they are written, so it’s crucial that, after you type in the user’s name into the button, you double-check that the device is saying the name correctly. If the name sounds correct you are good to go! But, what do you do if the device mispronounces the name?
Most, if not all, communication devices have an area where you can input “pronunciation exceptions” for any words included within the device that need to be pronounced differently than they would be pronounced based on their spelling. To activate these pronunciation exceptions and have them saved within the device, you must first type in the word as it appears on the communication device and then pair that with the phonetic spelling of the word, or how it sounds.
This video is an example of how you can do this within the TD Snap application: https://www.instagram.com/reel/C0fdlJ9xOEM/?igshid=NzBmMjdhZWRiYQ==
While this may seem like a simple task, sometimes the simplest tasks are the most important! Being able to say your name and hear someone else say your name correctly is vital for social connection and respect. So, next time you program an AAC user’s device or help an AAC user program their device, don’t forget to check how the device is pronouncing their name and adjust as needed.
by Megan | Jul 15, 2023 | AAC, blog, modeling
Time for an update!
In a previous blog post, I shared how I was working my way through the fantastic chart shared by Angela Moorad, MS CCC-SLP, from Omazing Kids AAC, LLC – Free AAC apps chart. Now, I’m back to update you on my progress, apps that I’ve added to my iPad through the steps in this chart, and the next steps, now that I have access to these apps.
Here are the apps that I have added to my iPad so far:

- TD Snap
- Proloquo
- Grid 3
- Touch Chat
- LAMP Words For Life
- Speak For Yourself
- Proloquo2Go
First and foremost, I want to acknowledge how easy this process has been and I 100% attribute that to the chart referenced above. Download this chart, follow the steps listed for each app and you too can add a variety of AAC apps to your iPad.
Before we move on, I want to be sure that I remind you that, just because you CAN get access to all of these apps, doesn’t mean that you SHOULD, or HAVE to! Let me explain…

While the companies are generous and provide free codes for downloads for their apps, these free download codes are not unlimited. Therefore, if you primarily use one app, want to learn more about a specific app, etc then that would be the app to start with, look at first and then wait on the others. However, if you are an SLP or other professional that provides AAC evaluations, it might make sense for you to have a variety of AAC apps available to you in order to trial them with learners, clients, etc. to determine which app works best for each individual. With that being said, I have downloaded these apps because I am actively providing AAC evaluations for a variety of learners and/or clients.
After being provided access to these AAC apps, my next steps, and what I would encourage you to do as well, is to continue your professional learning about each of these apps. Because, while all the apps provide a way to assist communication for those that need it, each app has its own, individual language system, organization, features, etc. Increasing your knowledge of the different features within systems will assist you when you are completing an AAC evaluation and determining which feature(s) will be best for each individual user.
With the ever-increasing variety of AAC apps available, this task can seem overwhelming, but remember, as I shared in a previous post – it’s ok to take your time. Start with one app, learn the features of that app, practice using that app, etc and then, when you feel confident, move on to a new app, then rinse and repeat.
Have you downloaded the chart yet? Are you working through learning more about AAC apps? Comment below and let us know how it’s going!
by Megan | Jul 2, 2023 | AAC, blog, training
You know how you hear some things and think that they are just too good to be true? Well, getting a bunch of AAC apps for your iPad for free may sound too good to be true, but I promise you it’s both – it’s good AND true!
First things first, I want to share that some of these apps that are free are the “lite” version of the full app, meaning that they may not have all of the features that the full app has, such as speaking, editing, etc. However, these “lite” versions are great to access to help determine what a system looks like, how to navigate throughout it, etc as this may help you decide if you would like to pursue the app further for your child, student, client, etc. If you were to pursue the full purchase of an app that you trialed in the “lite” version then all of the features would be opened up and fully usable once the purchase was complete.
 With all of that being said, there are some apps and companies that do provide FREE access to the FULL apps for various professionals working with AAC users to use for evaluation purposes. Angela Moorad, MS CCC-SLP, from Omazing Kids AAC, LLC has created an amazing resource that you can download for free from Teachers Pay Teachers (TPT) that shares a variety of AAC apps as well as how you can access the “lite” version and/or the full version for evaluation purposes. You can find this TPT resource here: Free AAC apps chart. She also has a wealth of information on her website about this and a ton of other AAC resources so make sure you check that out too!
To reinforce the fact that this is not too good to be true, I have been following her chart and the information provided within it and have started adding new AAC apps to my iPad for evaluations without paying a penny! In order to gain access to some of the free, full versions of the apps, the various app development companies may have some additional training that you need to complete prior to receiving the code for downloading the app. These trainings, etc are very helpful to ensure that you know how to best utilize the app to best serve the students, children, and clients that you will be using the app with.
I will share more about the processes I complete while adding various AAC apps to my iPad in future posts so stay tuned!
by Megan | Jun 24, 2023 | AAC, aided language input, aided language stimulation, blog, modeling
There are so many AAC apps out there – trying to learn all of them so that you can help provide access to those most beneficial for those you work with can be overwhelming, to say the least!
However, let me reassure you that:
- You don’t have to learn ALL the AAC apps/devices simultaneously!
- You don’t have to know ALL the AAC apps/devices before you can start providing AAC therapy.
- You can take your time and learn the apps/devices – building up your knowledge and AAC app repertoire one step at a time!
To illustrate this point, let me share a little bit about my journey as an AAC-loving SLP. Hopefully, this will reassure you that you are doing wonderfully, right where you are.

When I started as an SLP, 20 years ago, my first job was in a small elementary school that had one classroom for each grade K-6, two Exceptional Student Education (ESE) Pre-K classes, and four additional self-contained ESE classrooms and I was the only SLP. My caseload was huge and I was constantly on the run. There were lots of things that were difficult about being the only SLP (I’m sure some of you can relate) but I also learned so many invaluable things that have helped me become the SLP I am today.
You may be thinking, “That’s great, but how does this all relate to AAC?” – I’m getting there I promise – just stick with me. 😉

The majority of the students in the four self-contained ESE classrooms, and some of the students in the ESE Pre-K classrooms were non or minimally speaking and needed access to AAC. Thankfully, I knew in grad school I wanted to work with AAC users, however, as a clinical fellow, I still had a lot to learn. But, I did it scared and jumped in with two feet!
As I was learning, on (and off) the job, Dynavox (before they were Tobii Dynavox) was the company that produced the first high-tech devices that I introduced and used with the students I was working with. There were other devices and companies out there and I knew a little bit about them but not everything or much – and that was ok. I started out learning about ONE system. I started on an even smaller scale, learning one feature, option, use, etc, and then moving on to the next.
See how I’m bringing this all back around?

No matter where you are on your AAC SLP journey, there will always be learning opportunities. Take your time, focus in on what you want to and/or need to learn, and start there.
- Have a learner that is using LAMP? Start there…
- Like the layout of Touchchat? Start there…
- Have a learner that needs bilingual support offered by Coughdrop? Start there…
- You get the idea…😀
Don’t forget that you can learn alongside your AAC users as well! That is definitely what I did during that first year as an AAC SLP – and beyond. I think that it is great to learn alongside your learners. It shows the learners that it is ok that they don’t know how to use the device perfectly immediately. You are demonstrating a growth mindset, problem-solving and so much more!

We don’t have the luxury, or the time, to wait to start providing AAC therapy until we know all the different systems, devices, etc – our learners need us now, just as we are, learning alongside them. So, what AAC system/device are you going to learn next?
by Megan | Jun 11, 2023 | AAC, blog, training
Let me tell you about one of my favorite AAC tools. It’s wonderful to have in your back pocket for assessments, goal writing, progress monitoring, and more – and best of all, it’s FREE!
I could go on and on about my love for this tool, but for now, let me introduce you to the Dynamic AAC Goals Grid – 3 (DAGG-3). Here’s a quick overview of what the DAGG-3 gives us:
- Provides a way to systematically assess/reassess current AAC skills
- Assists with the development of a comprehensive plan for increasing communicative independence for the AAC user.
- Ensures that all communicative competencies are considered in an evaluation.
- Shows patterns of strengths and weaknesses to help determine the next steps for intervention.
- Acknowledges progress toward independence.
- Presents a “big picture” view of every learner and helps develop communication goals for now and the future.
That’s a lot of goodness right there! Let’s break it down step by step and section by section. (It will be helpful if you are able to download the materials from the link above or at least have them open in another tab while reading through this information to get the clearest picture of each section and its use.)
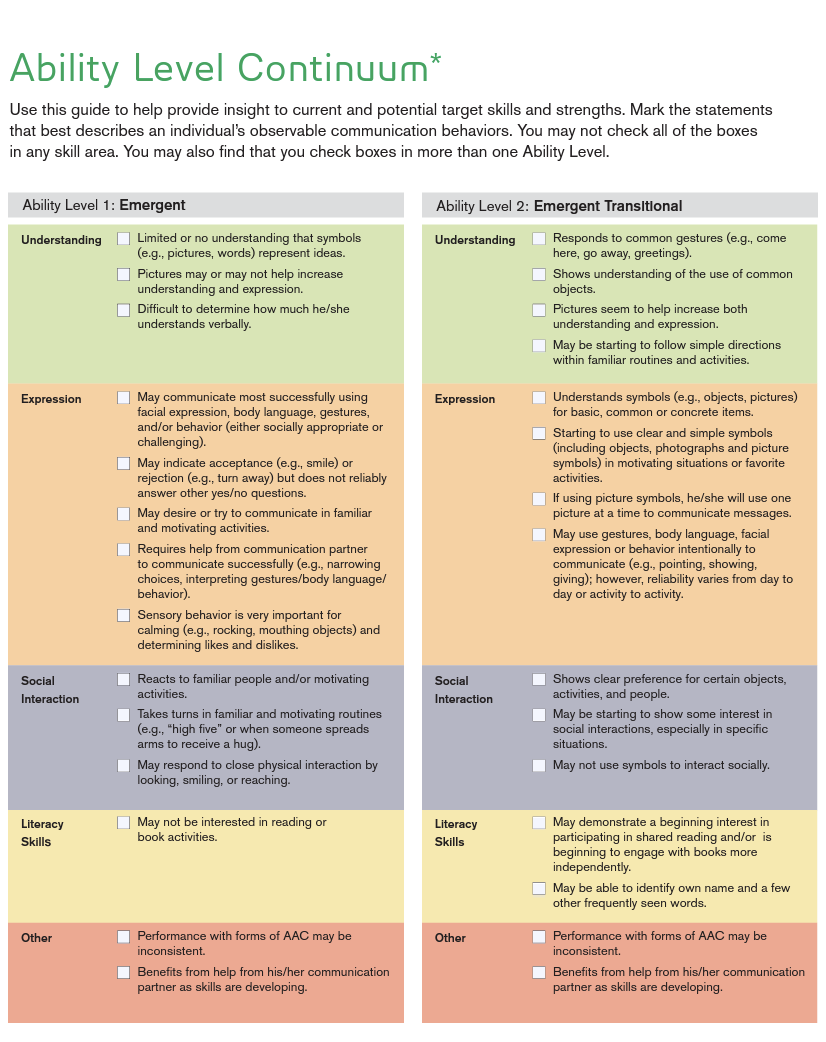
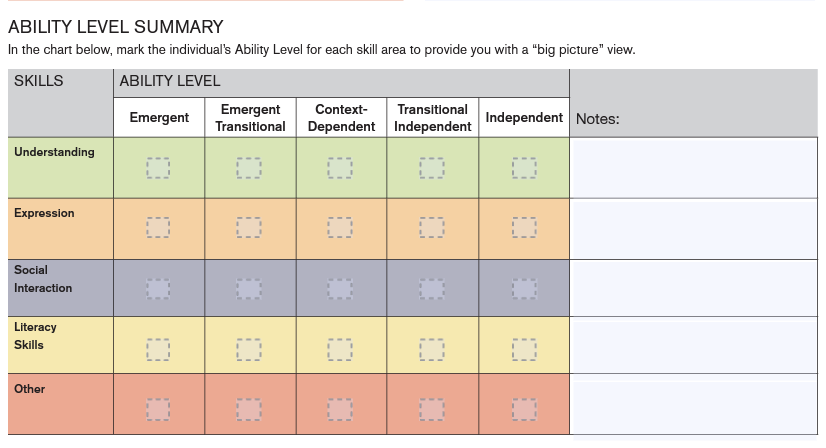
Let’s start with how to use the DAGG-3 for initial AAC assessments. We start with the “Ability Level Continuum” guide. This guide is broken into five different levels: emergent, emergent transitional, context-dependent, transitional dependent, and independent. Each of these levels are further segmented into specific areas: understanding, expression, social interaction, literacy skills, and other.
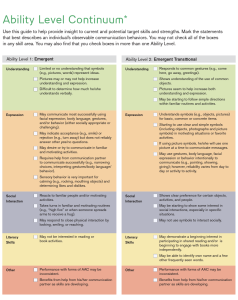
This guide is completed based on the learner’s current AAC use, keeping in mind that a learner may be at different levels for each of the different areas. Information gathered from completing this guide gives insight into the learner’s current skills and strengths in each area. After completing the guide, you can summarize the findings and see an overview of how independent they are within each area. There is also a section where you can make notes of various communication characteristics you observed, other communication modalities they use, strengths, barriers, etc. Once this guide is completed, you move on to the next step – choosing goals to address in one or more areas.
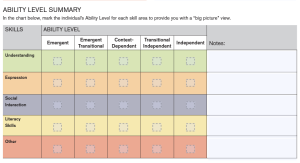
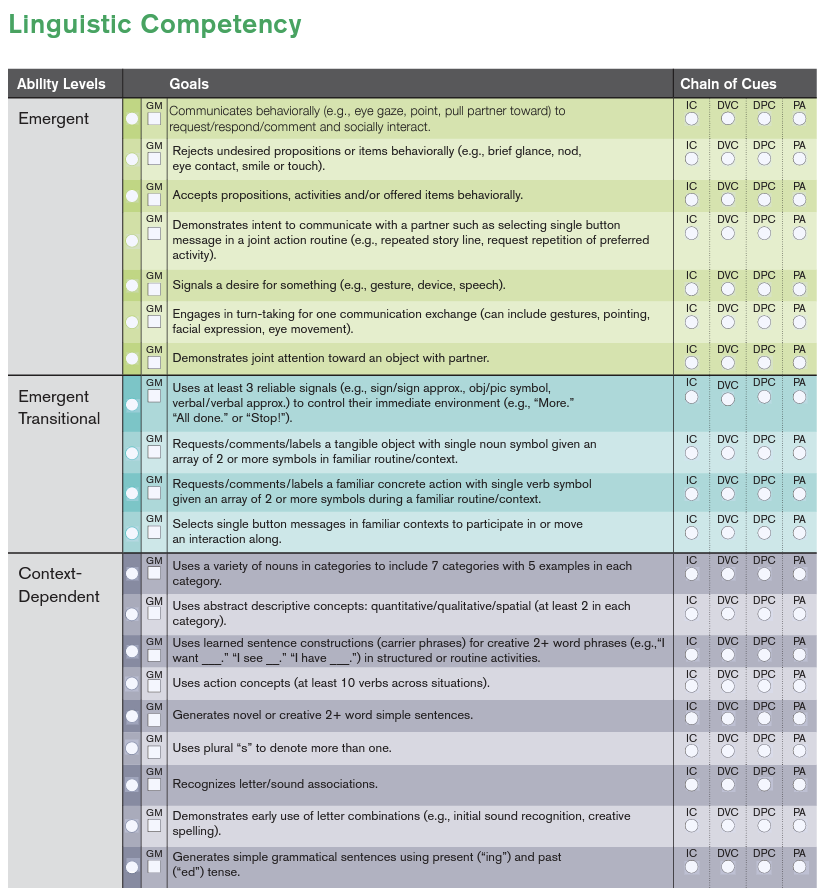
Referencing the information gathered & summarized in the “Ability Level Continuum” guide, we use that information to choose potential goals for the learner, within each of the different communicative competencies. Sample goal ideas are provided both for each communicative competency (linguistic, operational, social, & strategic) and for different levels outlined in the “Ability Level Continuum” guide. A chain of cues prompting hierarchy is also provided for each goal and level so that you can indicate which level of cueing the learner currently needs.
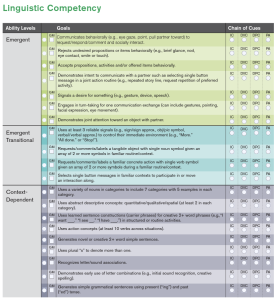
Using the ability levels and chain of cues provides an opportunity to not only see where your learner is currently with their AAC use and their independence, but it also allows you to see the next steps to continue progression and independence within each competency.
Now that we know where our learner is in their AAC use journey in reference to each of the communicative competencies, how independent they are within each of these skills, and have looked at some possible goal ideas, it’s finally time to draft the goals and objectives!
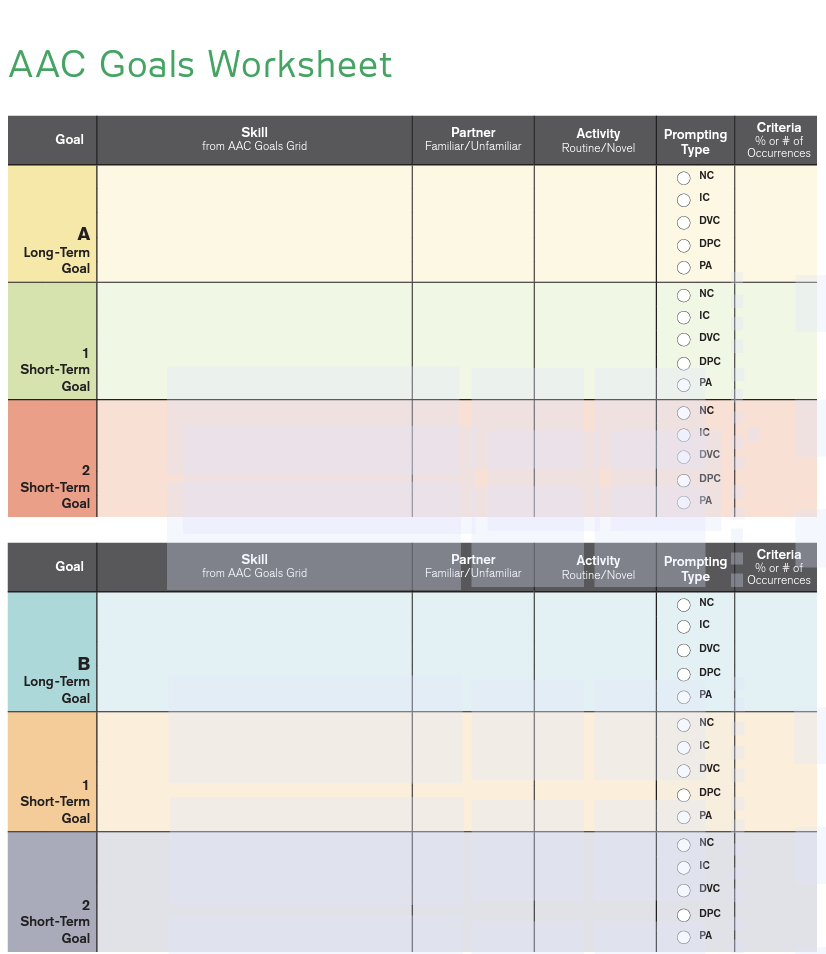
Once again the DAGG-3 is here to help with worksheets that walk us through the goal writing process step by step. AAC Goal Worksheets are here to help us choose a skill from each of the communicative competencies that we selected within the AAC Goals Grid, adding in the communication partner(s), activity, prompting type, and criteria to complete the goal.
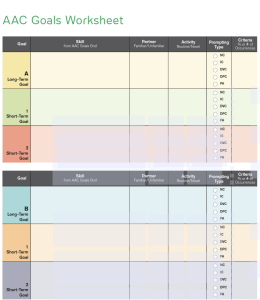
Talk about an all-in-one tool! Just using this one tool you have completed the AAC assessment, determined strengths and areas that need additional support, and written goals and objectives that will drive your treatment sessions! But, the goodness of the DAGG-3 doesn’t stop there! You can also use this tool for reassessments and progress monitoring – read on to find out how.
There are three different ways to look at reassessment & progress monitoring using the DAGG-3:
- Look back at the Dynamic AAC Goals listed by competency and mark any progress in the level of cueing. (Use a different color pen and/or mark the date of reassessment to denote progress monitoring.)
- Use the AAC Goals Periodic Progress Report to record progress in each competency area. Keeping track of the percentage of goals mastered within each competency area will help you track and see when a learner is ready to move towards a different independence level within each competency level.
- Using this information, review the goals you wrote using the AAC Goals Worksheet and revise as needed.
If you are still unsure on how to use the DAGG-3 there is a detailed instruction PDF that walks you through exactly how to use the tool included within the free resources.
By now I am sure that you are in love with the DAGG-3, just as much as I am but I have a surprise for you – there’s still more goodness to share!
- Not only is the DAGG-3 available in paper form, but it is also available digitally, still FREE, through the Pathways for Core First app. Within the digital version of the DAGG-3, you can create “users” for multiple learners, as well as print, save, email, and update individual information as needed. This digital version is a great way to reduce paperwork AND each goal within the goals grid has lesson plans and activity ideas that you can download to help you work with your learners towards achieving their goals! You can access the digital version of the DAGG-3 in the Pathways for Core First app here.
- Paired with the instructions is a sample report written with information gathered from the DAGG-3 to help you get started writing a comprehensive evaluation or progress report.
- Within the resources there are a TON of different sample activities and goals that are ready for use and aligned with each ability level and competency area, FREE and ready for you to download. (Here’s a tip, if you scroll down to the bottom of each competency area there is a link for you to download all the goals/activities at once so you don’t have to click on each one individually.)
All the steps involved in AAC assessments, selecting goals, progress monitoring, etc can be very daunting and time-consuming. Hopefully, this information and the DAGG-3, either paper or digital versions, will help you feel more confident in your ability to complete these tasks effectively and efficiently!
by Megan | Feb 10, 2021 | AAC, aided language stimulation, core vocabulary, modeling, Sensory, Sensory extension activities, Storybook Sessions
Storybook Sessions: Garrett Morgan
In each Storybook Sessions post, I highlight a book that I have used, or plan to use in therapy as well as associated, extension activities that can be paired with the book to increase vocabulary comprehension, provide opportunities to express yourself verbally, written, creatively, etc., sensory exploration, fine motor practice, gross motor movements, etc. Some extension activities will focus on all of these components while others will focus more specifically on one area.
Garrett Morgan
Author: Megan Stewart
Illustrator: Symbols by Boardmaker 7
Do you ever have an idea for an activity to do, book to read, etc but can’t find exactly what you are looking for? Anyone else, or is it just me?
This happened to me while I was planning for my February sessions. I knew I wanted to highlight a famous black person from history to celebrate Black History Month with my students but while looking for a book to lead my activity/session, I wasn’t able to find what I was looking for. I will say that there are a TON of great kids books featuring and highlighting famous black people, however I waited too long to put these on hold or check out from my library, so I decided to create my own.
My Book Creation Process
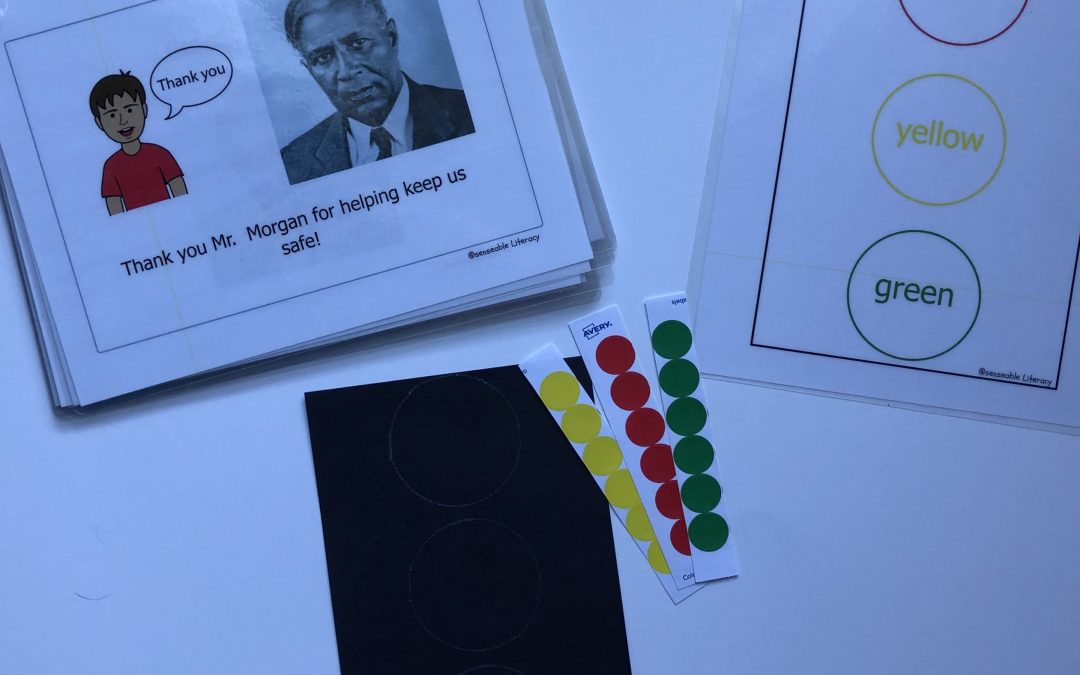
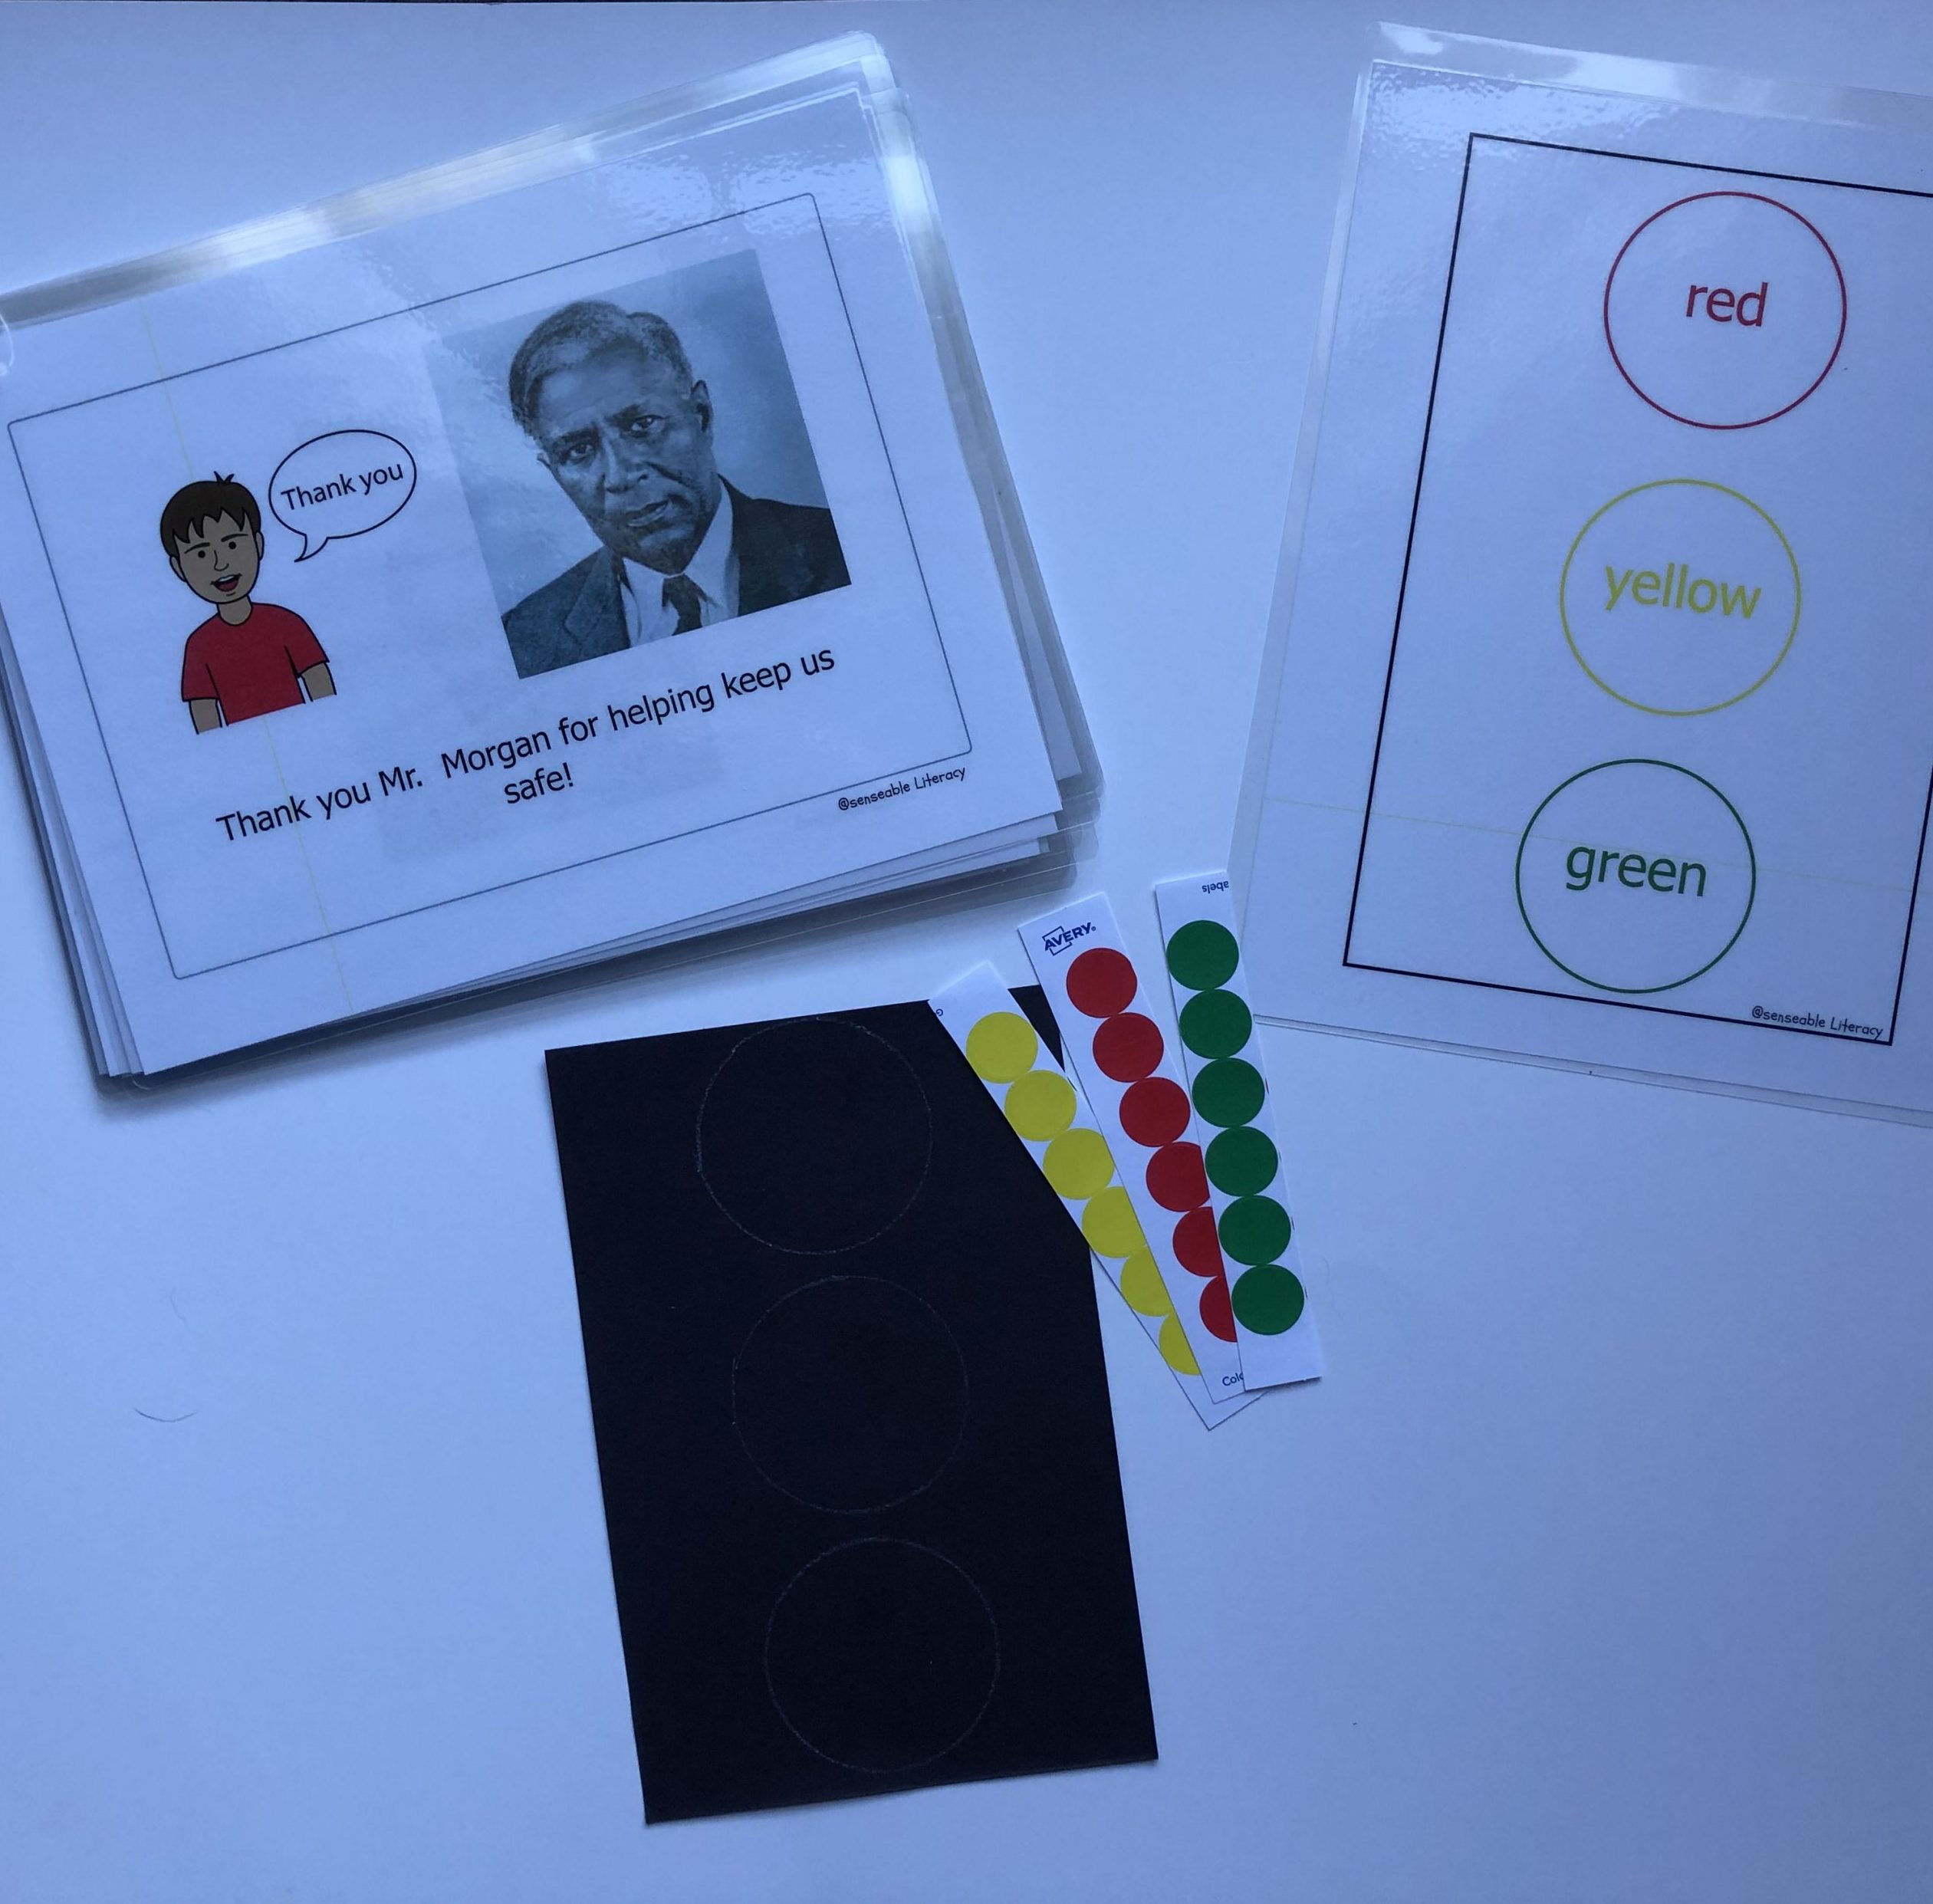
I chose to highlight Garrett Morgan, who added the yellow light to the stoplight as we now know it, within my lesson. With a quick Google search to find a picture of him, and learn a little more about him and his inventions, I took that information, opened Boardmaker 7 software and got to work! Using the printable book template, I was able to easily add in pictures, symbols and text that told the story of who Garrett Morgan was, why we need to learn about him, what his invention was (Mr. Morgan did invent items other than the stoplight, (i.e., the gas mask), but I thought this invention was most appropriate to highlight for my PreK students), and how it has affected our world. Here’s a sneak peek of the book:
Now What?
Now that I had the book, I needed to decide on the extension activities to continue our learning after we read the book. I chose activities that focused on color, shape and number recognition & labeling, spatial concepts, fine motor skills, bi-lateral (both sides) hand coordination, sorting, following directions, and gross motor skills.
Creating A Personalized Stoplight
In the first activity, the students create their own stoplight.
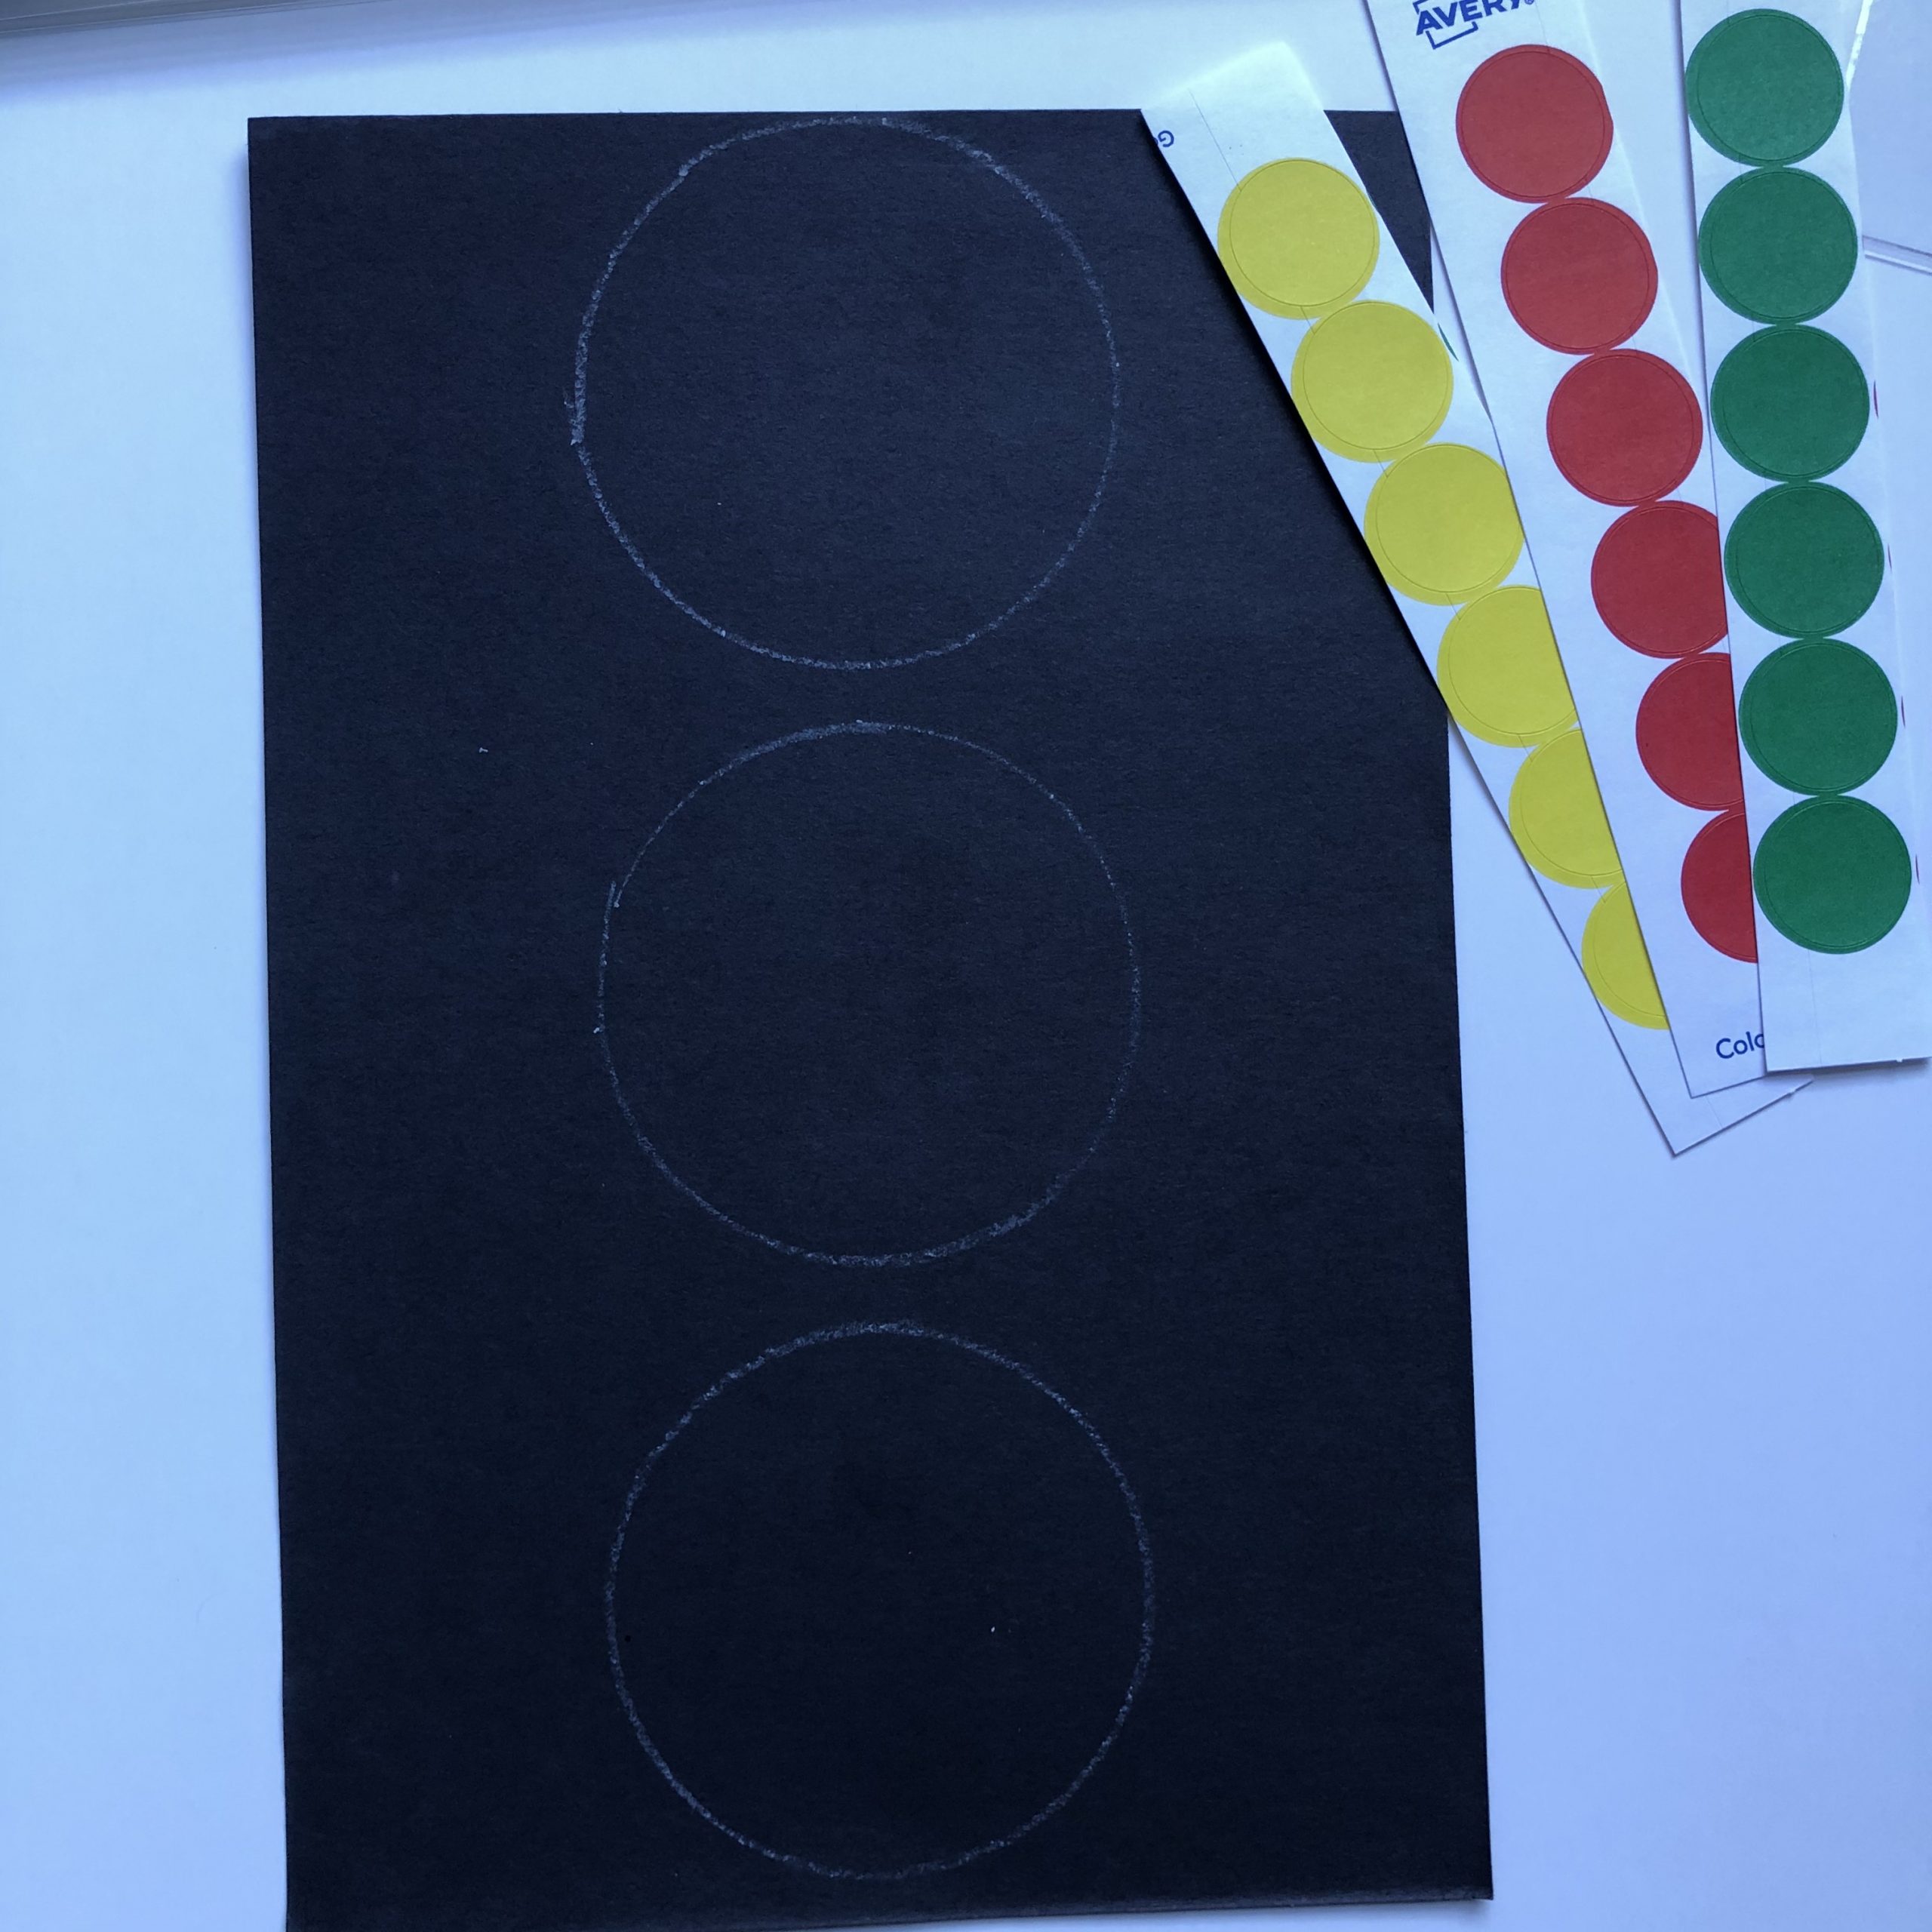
First, I cut black construction paper into rectangles and drew 3 circles down the center with a white crayon.
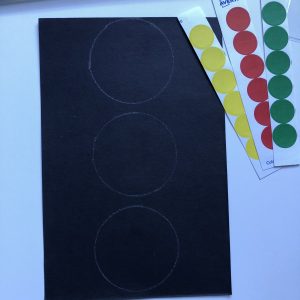
Stoplight template and stickers
Second, I cut color coding stickers from Avery into strips of yellow, green and red.
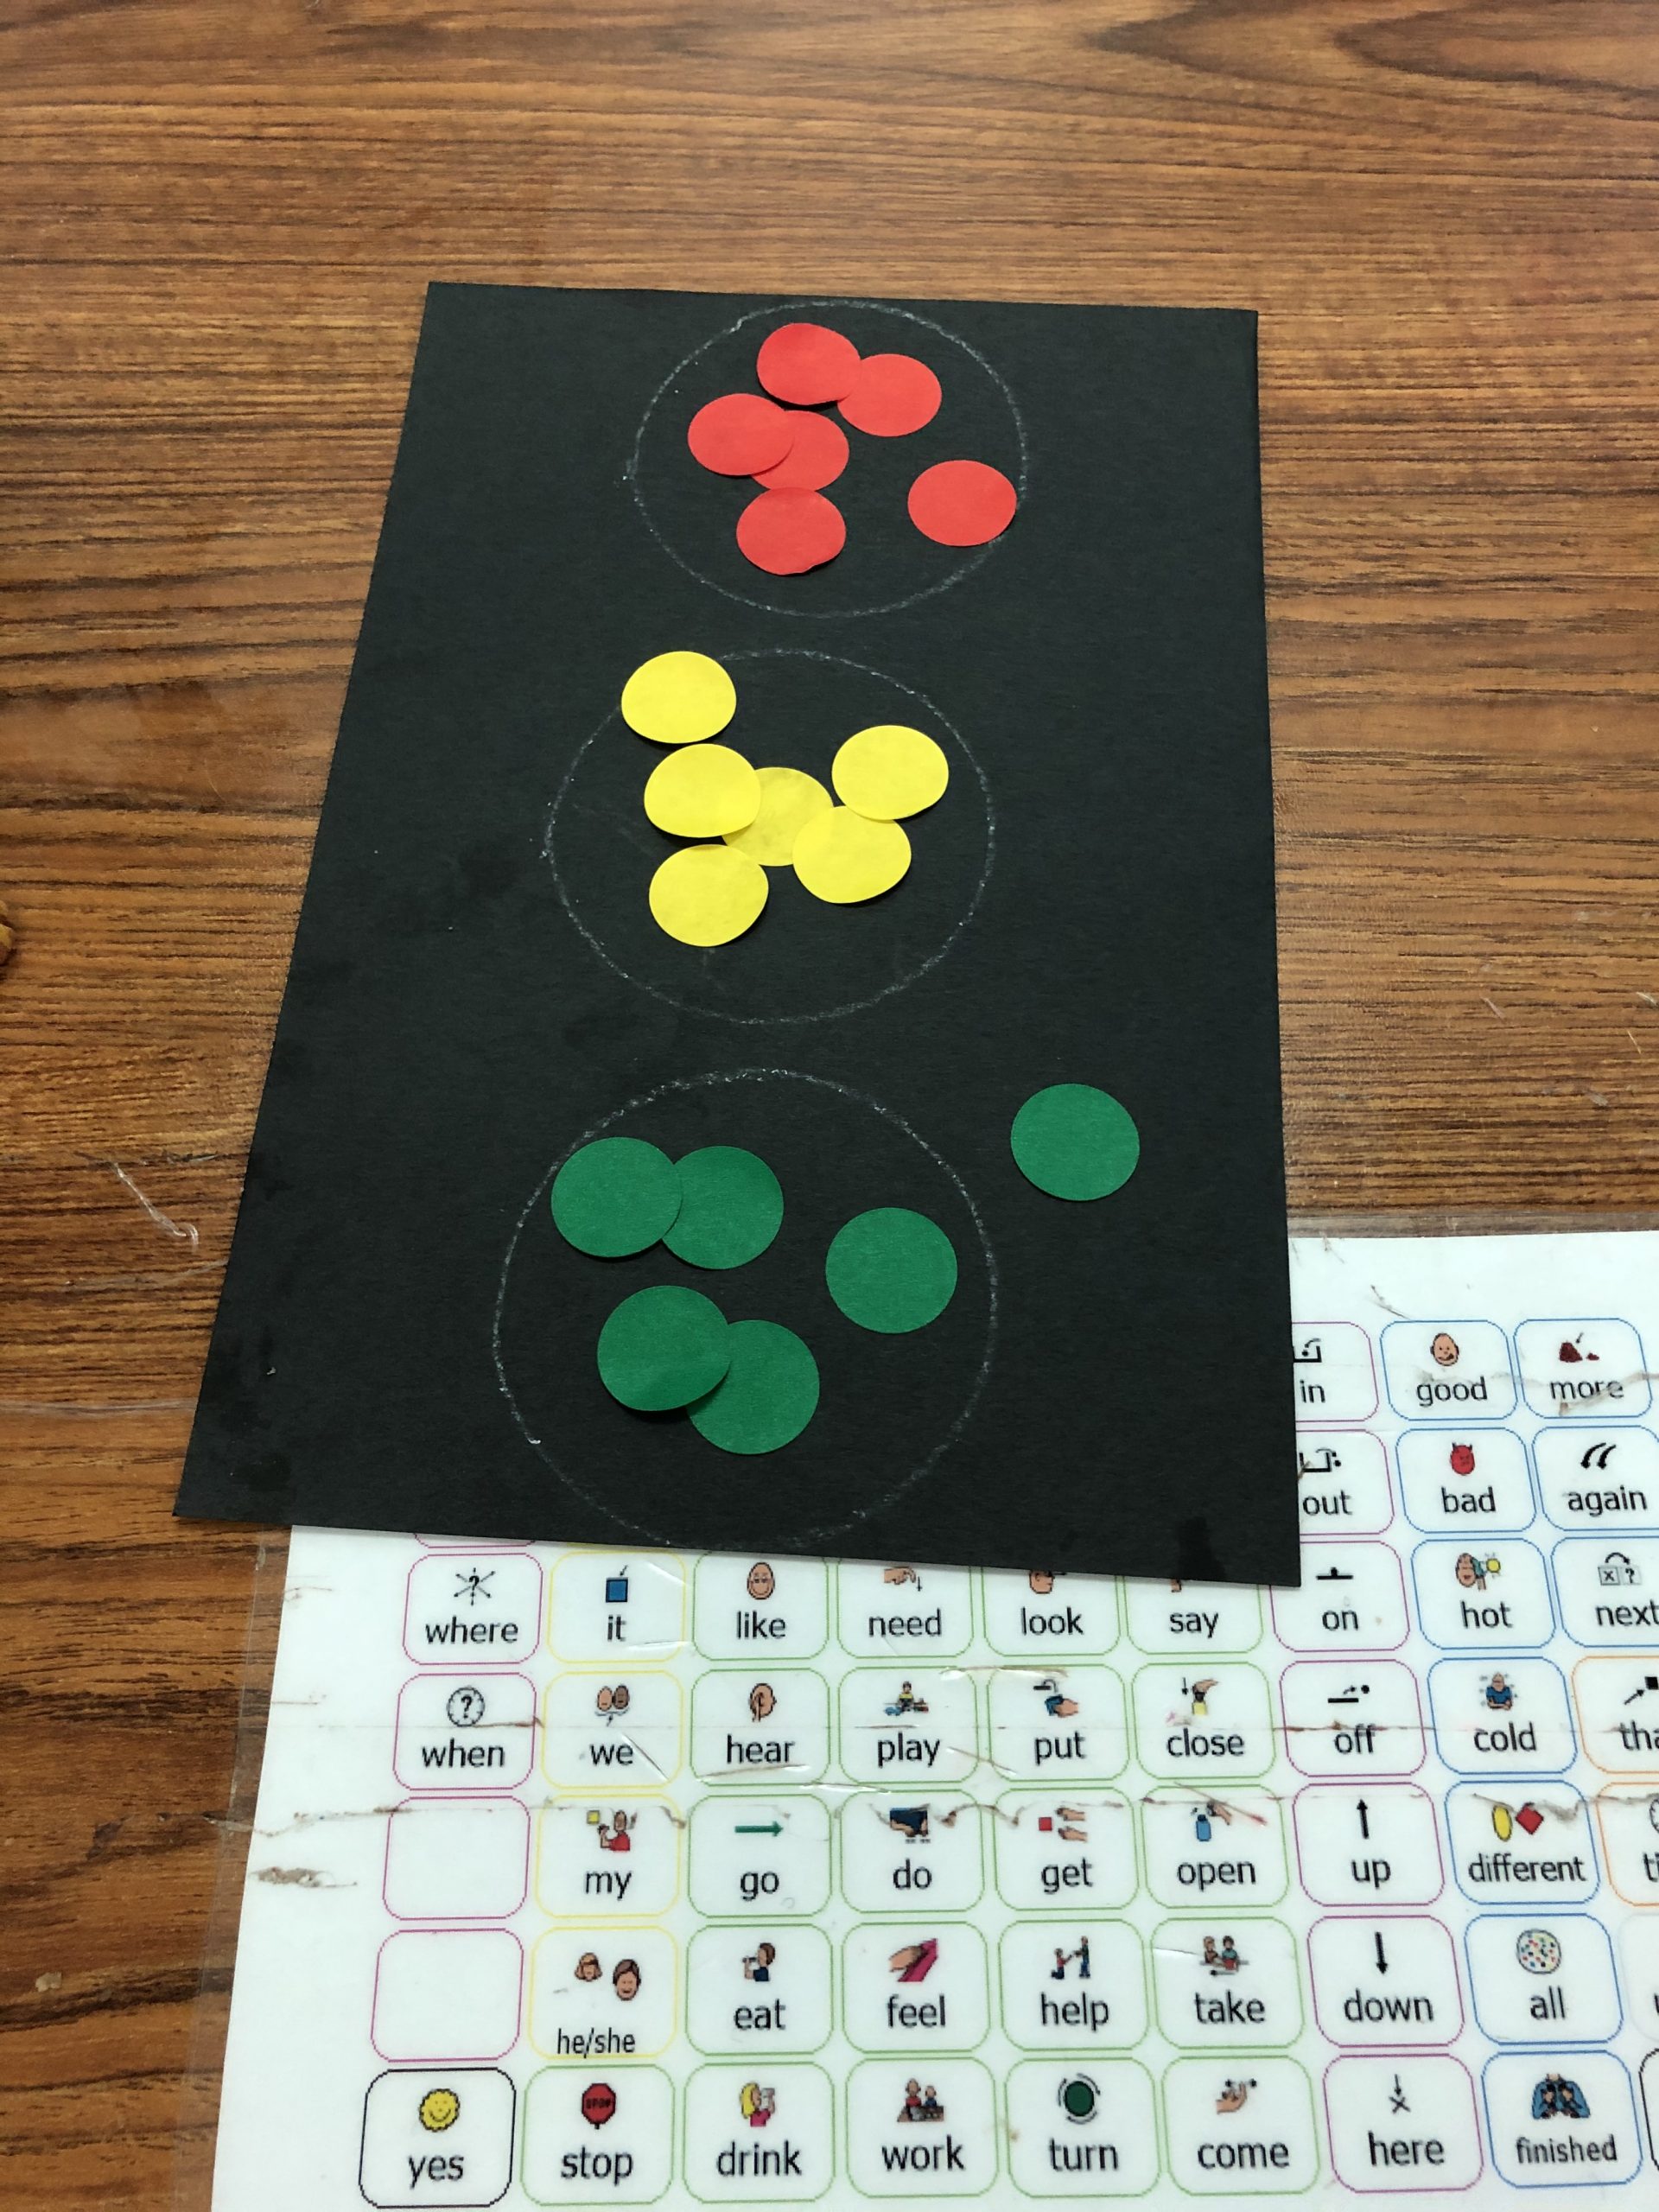
Each student was given a stoplight template and, after a model from an adult, placed all of the colored stickers onto their stoplight template. Hopefully the students placed the stickers in the right place based on color, but if not, that’s ok too – I am all about fostering independence and creativity and this is not a test!
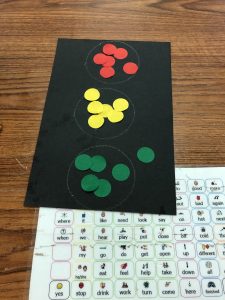
Student Created Stoplght
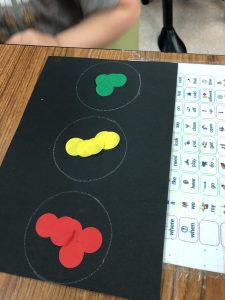
Student Created Stoplight
Additional Skills Addressed While Creating the Stoplights
While the students were making their stoplights, we were able to focus in on the topics of:
- Colors
- Shapes
- Location words (prepositions)
- Quantity (numbers, more, less)
Don’t forget all the Core Vocabulary!
And of course we used our core vocabulary communication boards to chat, modeling words, individually and in short phrases, such as:
- Put
- On
- More
- Where
- Help
- Want
- Like
- Not
- Different
- I
- My
- You
- Finished
- Here
- That
- Again
- Next
- See
- All
The Fun Doesn’t Stop There!
After students finish their stoplight you can:
- Help them write their name on their paper and send home to share with families.
- Laminate their stoplight to use in additional extension activities such as sorting by color.
- Use this sorting template to find items that are red, yellow and/or green in their environment.
- Watch some fun “stoplight videos” such as:
- Play “Red Light, Yellow Light, Green Light” to help get the wiggles out. You can use these visuals to further show students if they are to “GO”, “SLOW” or “STOP”.
- Play with cars and other vehicles, using your traffic light to tell the cars to “GO”, “SLOW down” or “STOP”
This Sounds Great! Where Can I Find These Resources?
If you are interested in doing these activities and/or reading the book about Garrett Morgan to your students I have linked them here for you to download:
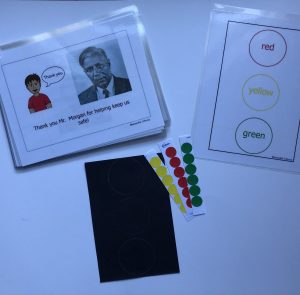
Garrett Morgan book and activities
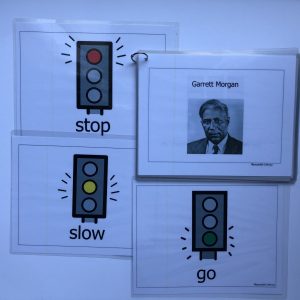
Garrett Morgan Printable and activities
If you create stoplights in celebration of Garrett Morgan and his invention, I’d love to see it!
Post pictures in the comments below or tag me (@senseableliteracy) in posts online!
Until next time – Happy Reading!







Recent Comments